This article is divided into two parts. First about Spring Boot Web Application and the second part is Tomcat Web Application without database.
Spring boot Web Application
1/ Create Web app with Azure account
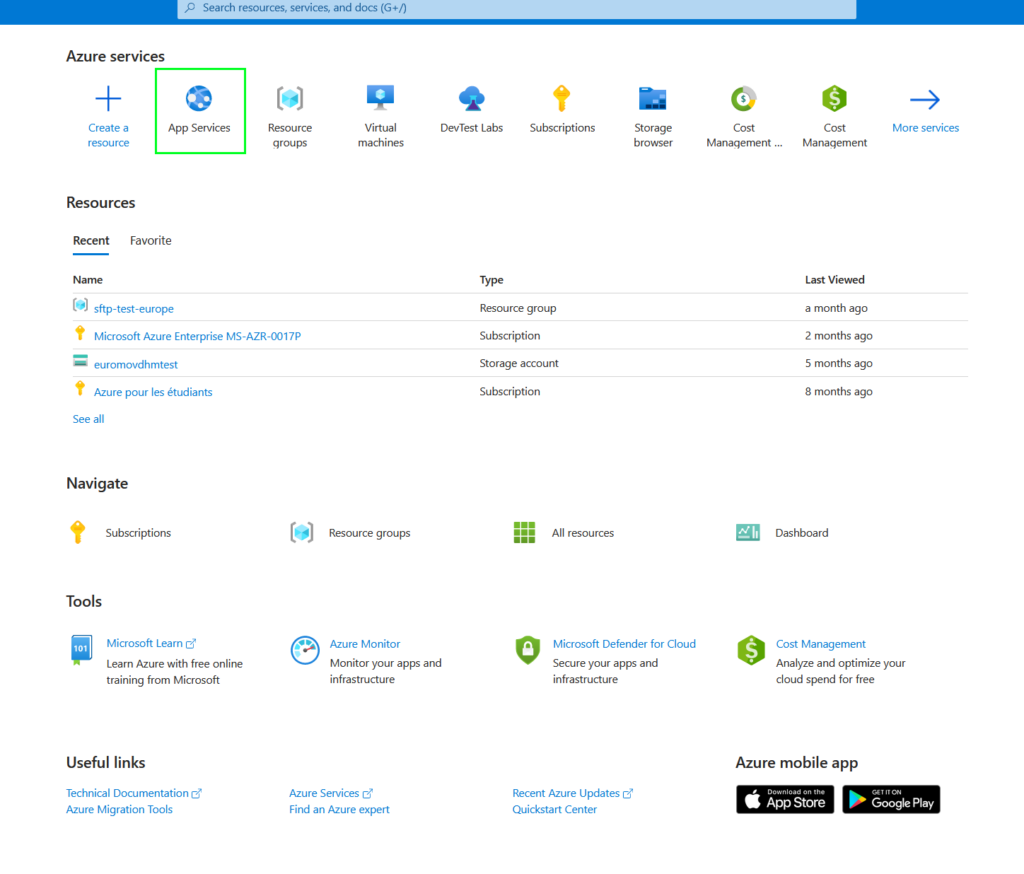
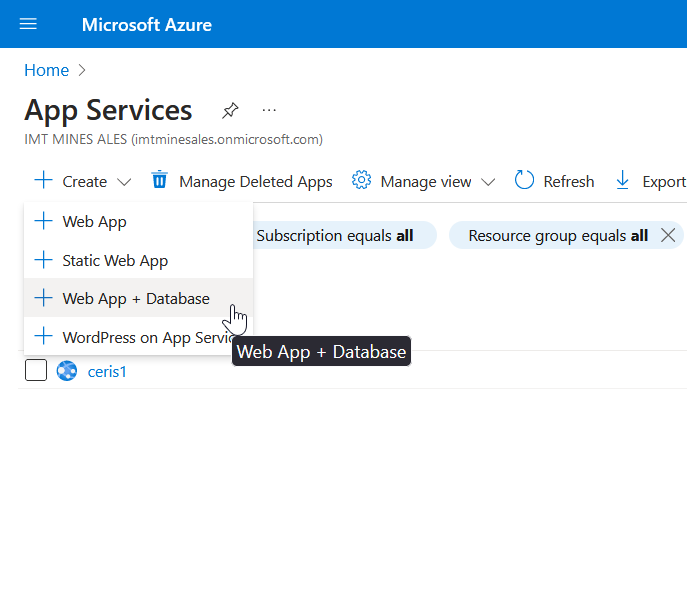
Then choose to create a Web App of type Web App + Database :
Then provide information at first :
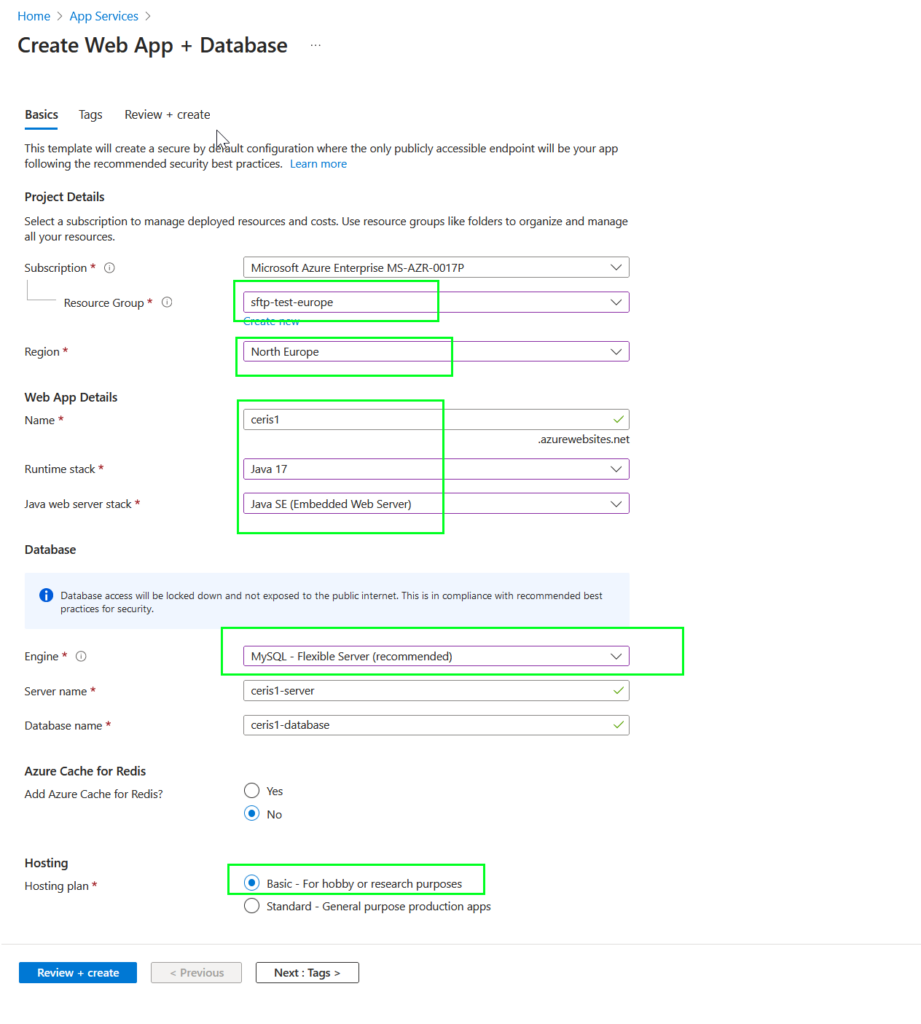
The « Ressource Group » is just a group of several « tools » provide by Azure in ours cases the already created empty group « sftp-test-europe » just provide networks settings, virtual network, database server, web app server and App Service plan.
We need to provide web app name here ceris1 as application name. This information will be used to create URL, database name, etc.
We provide the runtime stack of Java 17, and the Java web server stack » Java SE (Embedded Web Server) ».
Then we choose MySql database and check « Hosting Basic for hobby or research » to avoid to paid too much for a test.
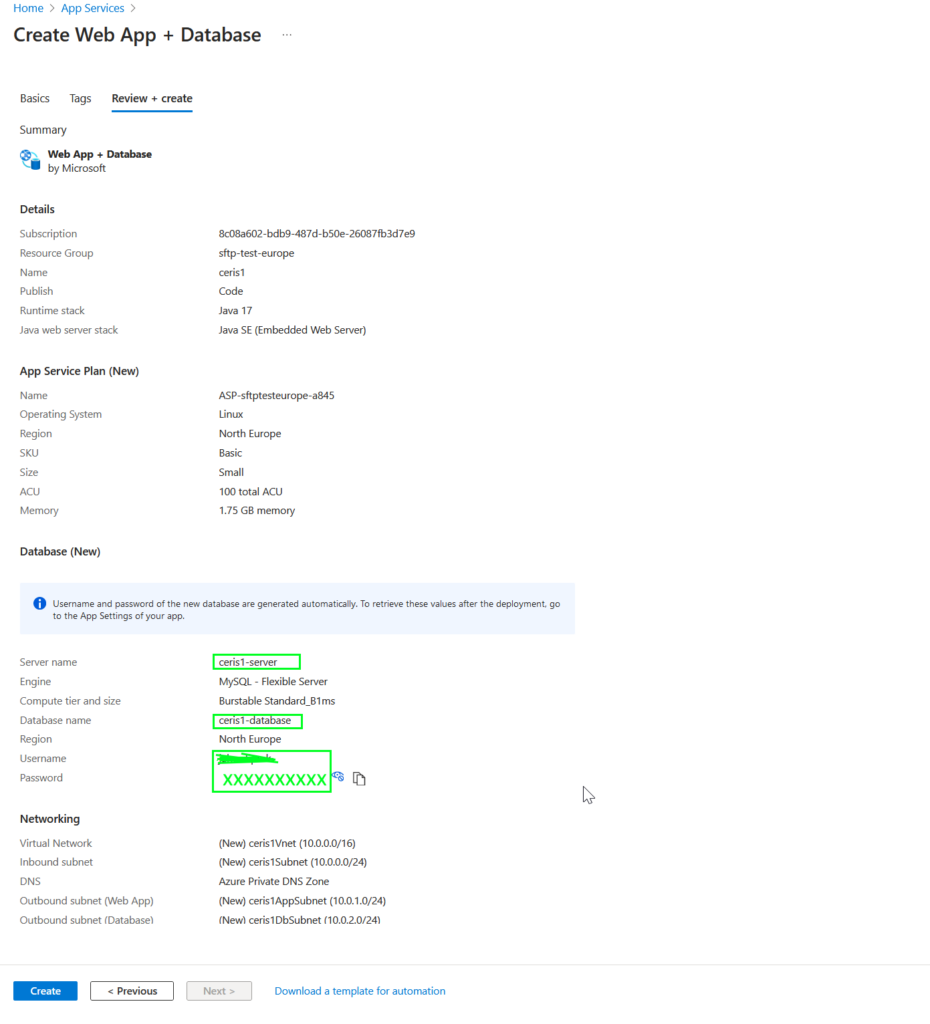
The second interface provides information to keep about MySQL settings include server host, login, password, and default database name ceris1-database for me. The default MySQL port should be 3306.
2/ Modification Spring application
Change the file applications.properties to provide the azure MySQL settings as :
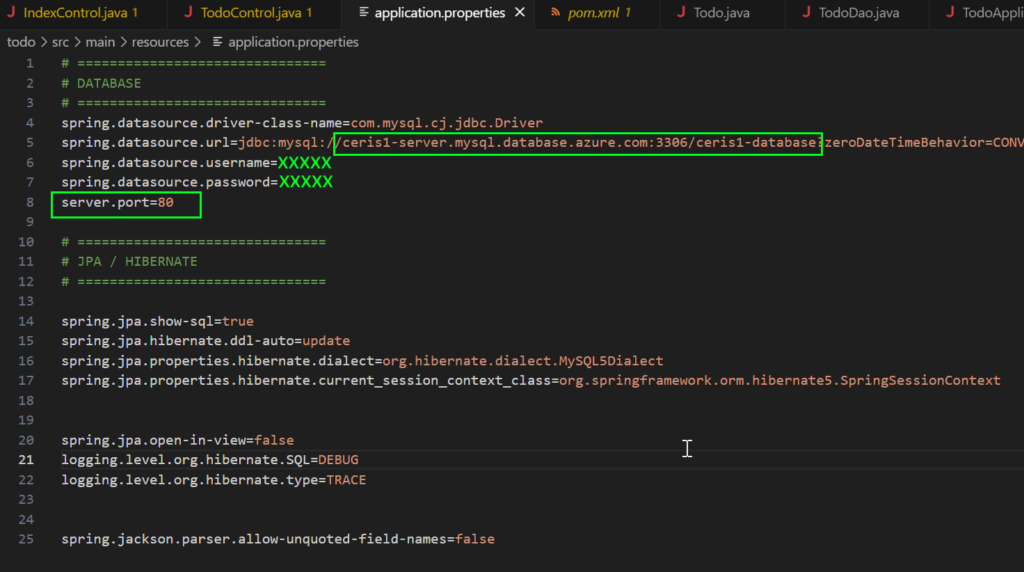
I change the default Web server port from 8080 to 80 to create classical URL :
http://ceris1.azure.com/
We need to generate the final jar of our application, but we also need to avoid tests from Spring. Why, we do not have access to the Azure MySQL server to test our application, so the command will be :
mvn clean install spring-boot:repackage -DskipTests to create
If the creation is OK, you will find a new jar file into :
C:\Dev23\Workspace-vscode-182.2\todo\target\todo-0.0.1-SNAPSHOT.jar
Then we need FTPS settings to upload the jar file, with « Deployement Center » we can find several methods but historical FTPS is simple :
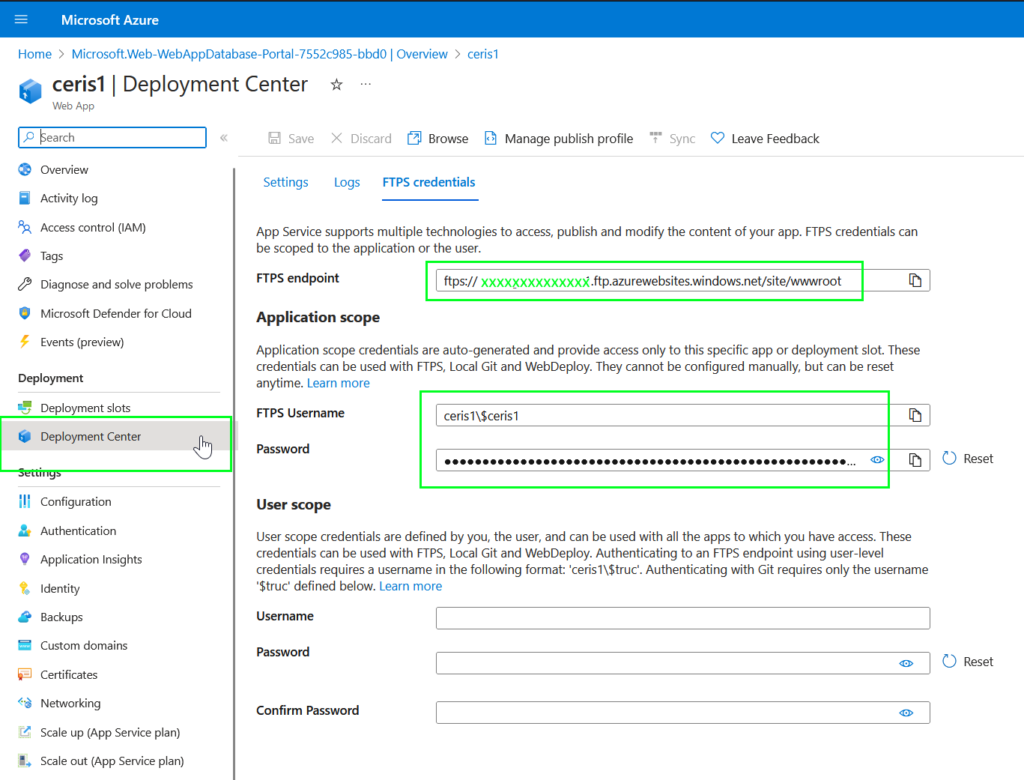
We need FTPs server name (FTPS endpoint), FTP Username and Password to upload file.
Open Filezilla or any ftps client with settings, remove the default file into « /site/wwwroot » folder and drag and drop the newly created jar file :
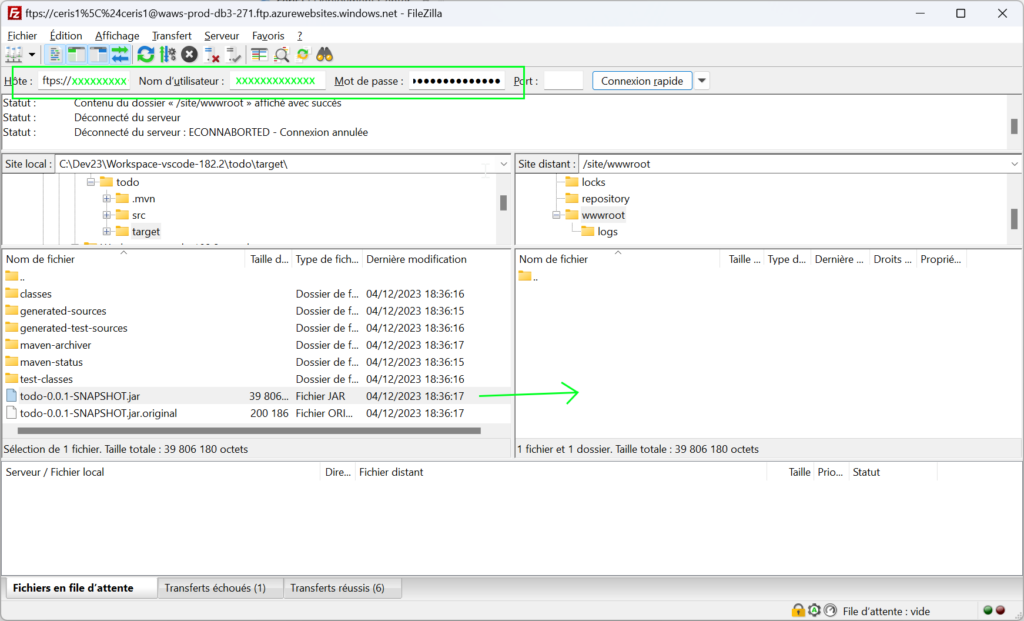
You can test running the project with the Azure SSH console with :
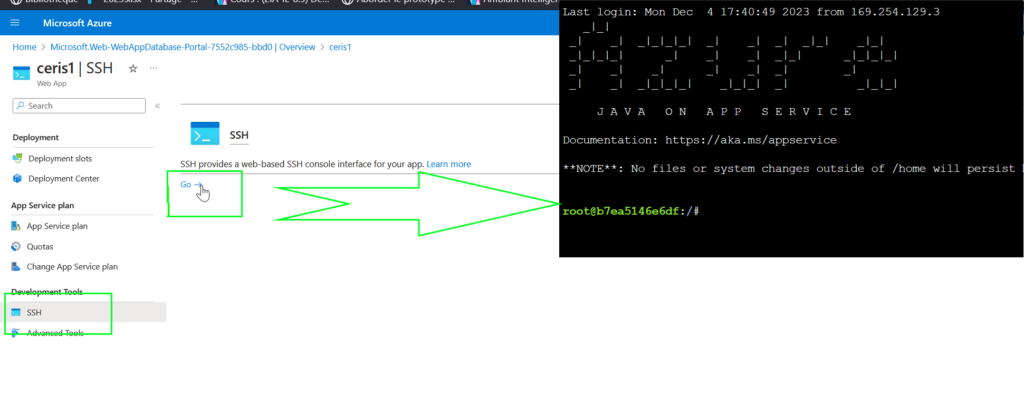
The first time, open the consol is really slow, but I use it a lot to understand which settings is not OK about MySQL, port, java version, etc. That really useful.
Enter the command to start spring server with our development after may be a change directory to /home/site/wwwroot/ default folder :
java -jar todo-0.0.1-SNAPSHOT.jar
You should find the classical deployment information :
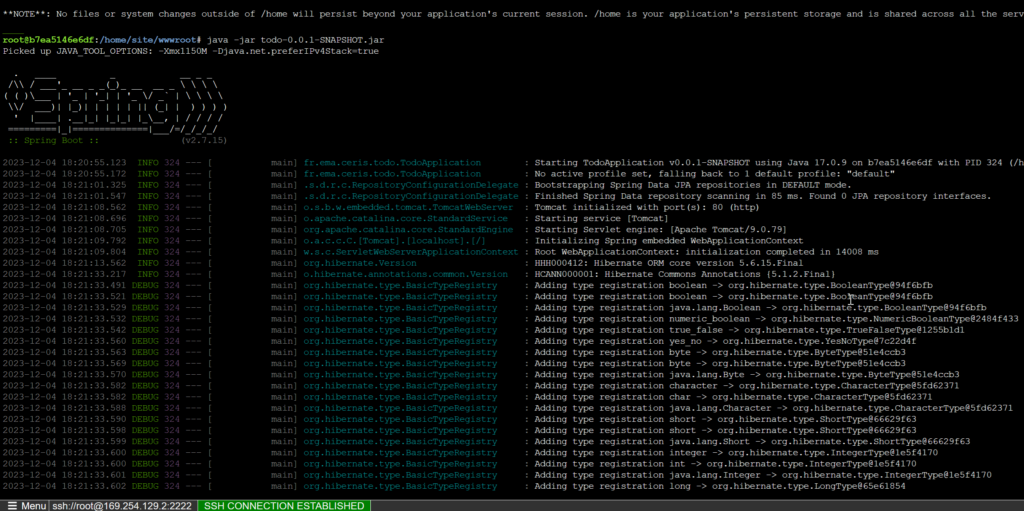
You should have a port 80 conflit at the end because the default web start application is still alive. Just « Restart » the web app from the Azure interface to let remove it after remove the default file with Filezilla or the Azure console.
Restart the application with the command line and test it online : https://ceris1.azurewebsites.net/.
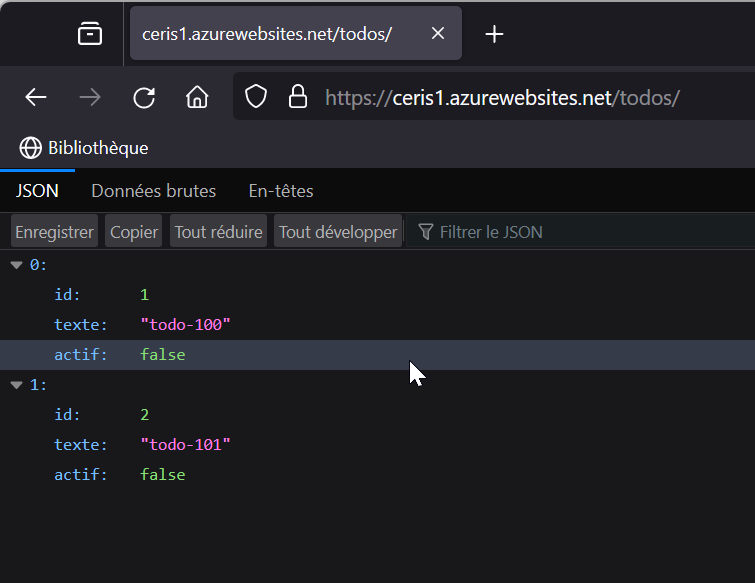
NOTE: the automatic deployment from git server should be used be the purpose here is to understand the basic deployment from a simple jar application.
Tomcat War Web Application
From Eclipse Java EE, we suppose to have a Dynamic Web Project with servlet and JSP. At present, we will not include a database, but the process will be identical as Spring boot Web Application.
1/ Create Web App with Azure account

Then choose to create a Web App of type Web App :

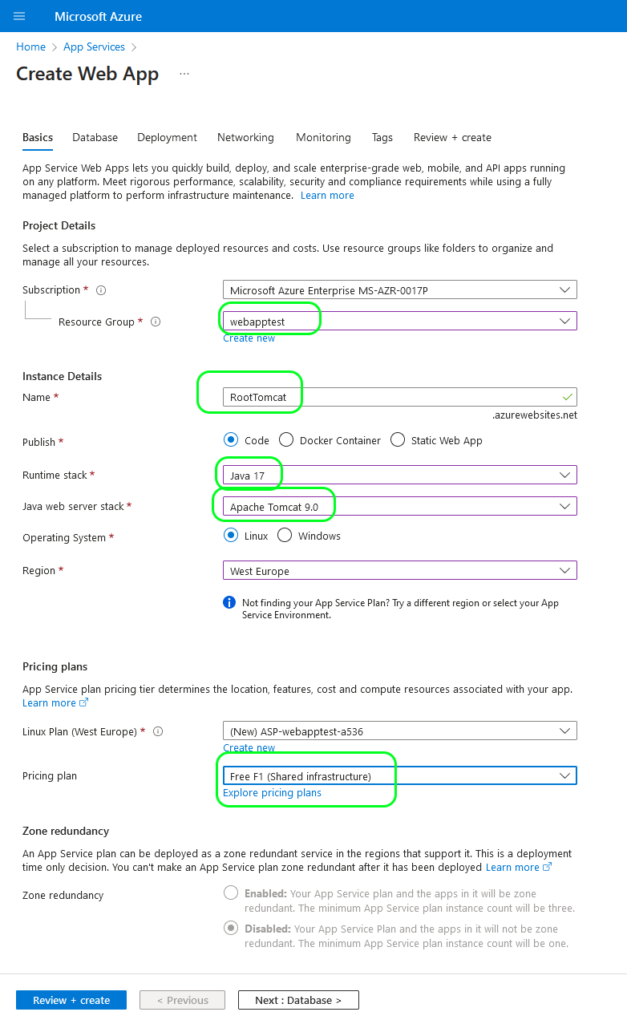
Then provide information at first :
- Resource Group : a group of applications of azure, but in our case it will a group of only this Web App
- Name: Name of the instance just for URL, and to identify this Web App
- Runtime stack: Java 17 for our web application
- Java web start stack: Apache Tomcat 9.0
- Pricing plan: free F1 (Shared infrastructure) to test this application for free
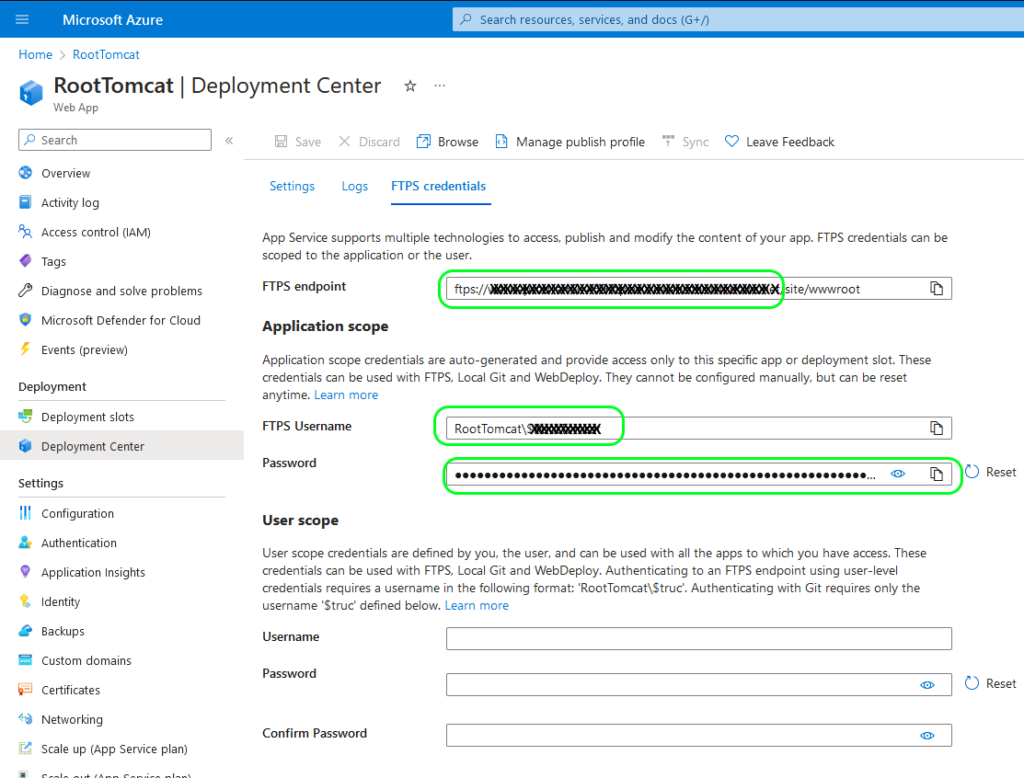
After the creation of the instance of web application (could take several minutes), we will consult the « deployment Center » and « FTPS credentials » that we will use to upload with FTP.
2/ Create and deploy war file
Open Eclipse Java JEE to create a war file from your application :
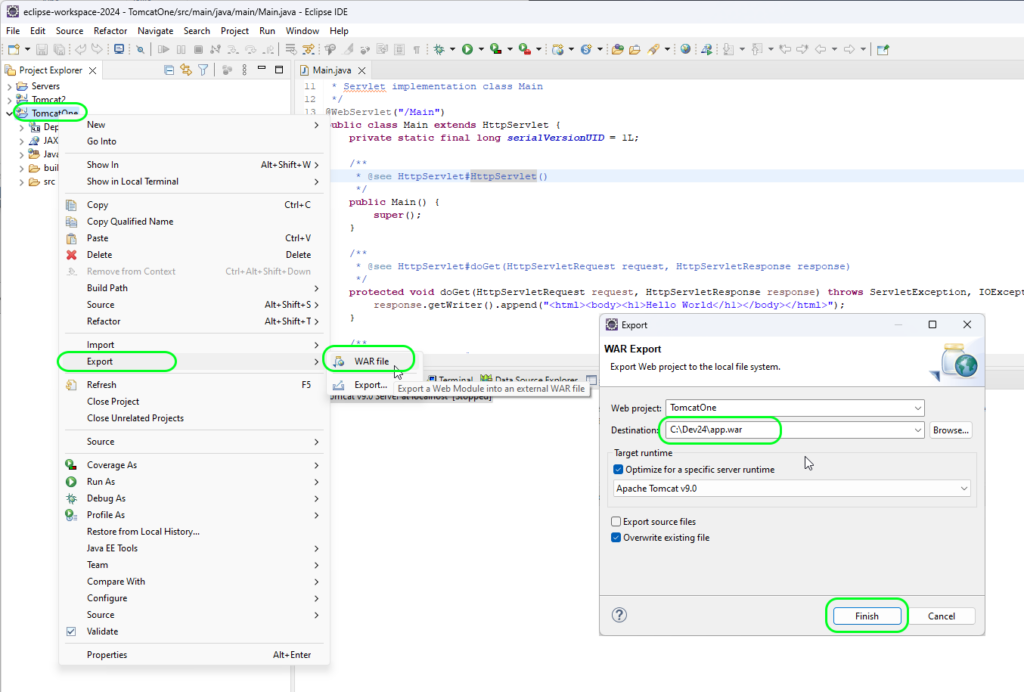
Right-click on your project, the menu Export > war file then provide the destination to create the file : c:/Dev24/app.war. You have to teep the app.war as the name of the war file.
Then use Filezilla to upload the file, but I find a bug from FTPS credential : use a FTP connection NOT FTPS to simply upload the file from C:\Dev24\ to the /site/wwwroot/ :
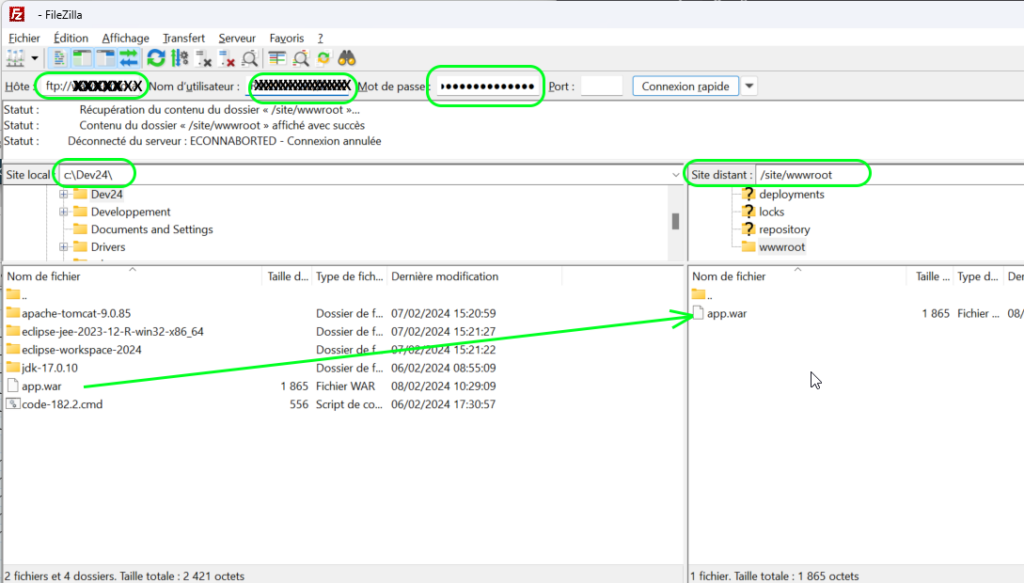
I delete the initial hostingstart.html welcome file installed by default by Azure Web App.
Then you can consult your application, which will deployed after a short delay (several minutes) :
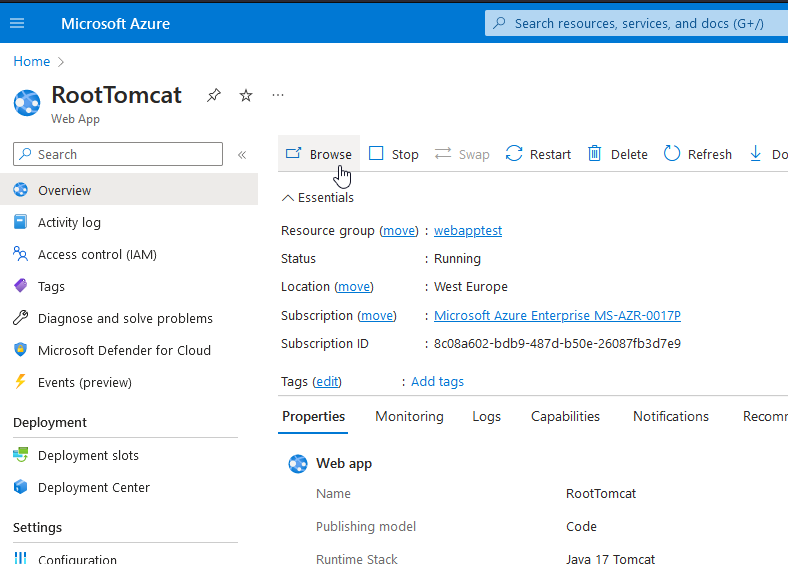
The Web application will be slow because we only have a free container for purpose. We can consult the Azure ssh console into the browser to manage logs and information about tomcat.
