
1/ Add a CSS style sheet
With Eclipse, add a new folder css into the folder webapp as (the screenshot show WebContent folder which was the past name of webapp folder) :

Menu New > Other then filter the very long list file with css then choose CSS file. Then create a style.css file with the content below :
div#central{
  position:absolute;
  left: 50%;
  top: 10%;
  width: 800px;
  height: 800px;
  margin-top: -50px;
  margin-left: -400px;
  color: black;
  background-color:rgb(200,220,200);
  padding: 20px;
}
ul {
  list-style: none;
  margin: 0;
  padding: 4px 4px 4px 4px;
}
ul > li{
   display: inline;
}
div#menu{
  position:relative;
  left:10%;
  width:80%;
  background-color:rgb(200,240,220);
}
To use this css your code should containts 2 tag div with « id » as central and another « id » as menu. Consider include the div menu inside the div central and add the link between your JSP and the style.css into the <head> tag :
<link rel="stylesheet" type="text/css" href="css/style.css">
<div id="central">
 <div id="menu">
      <!-- Menu area -->
 </div>

    <!-- Content area -->
</div>
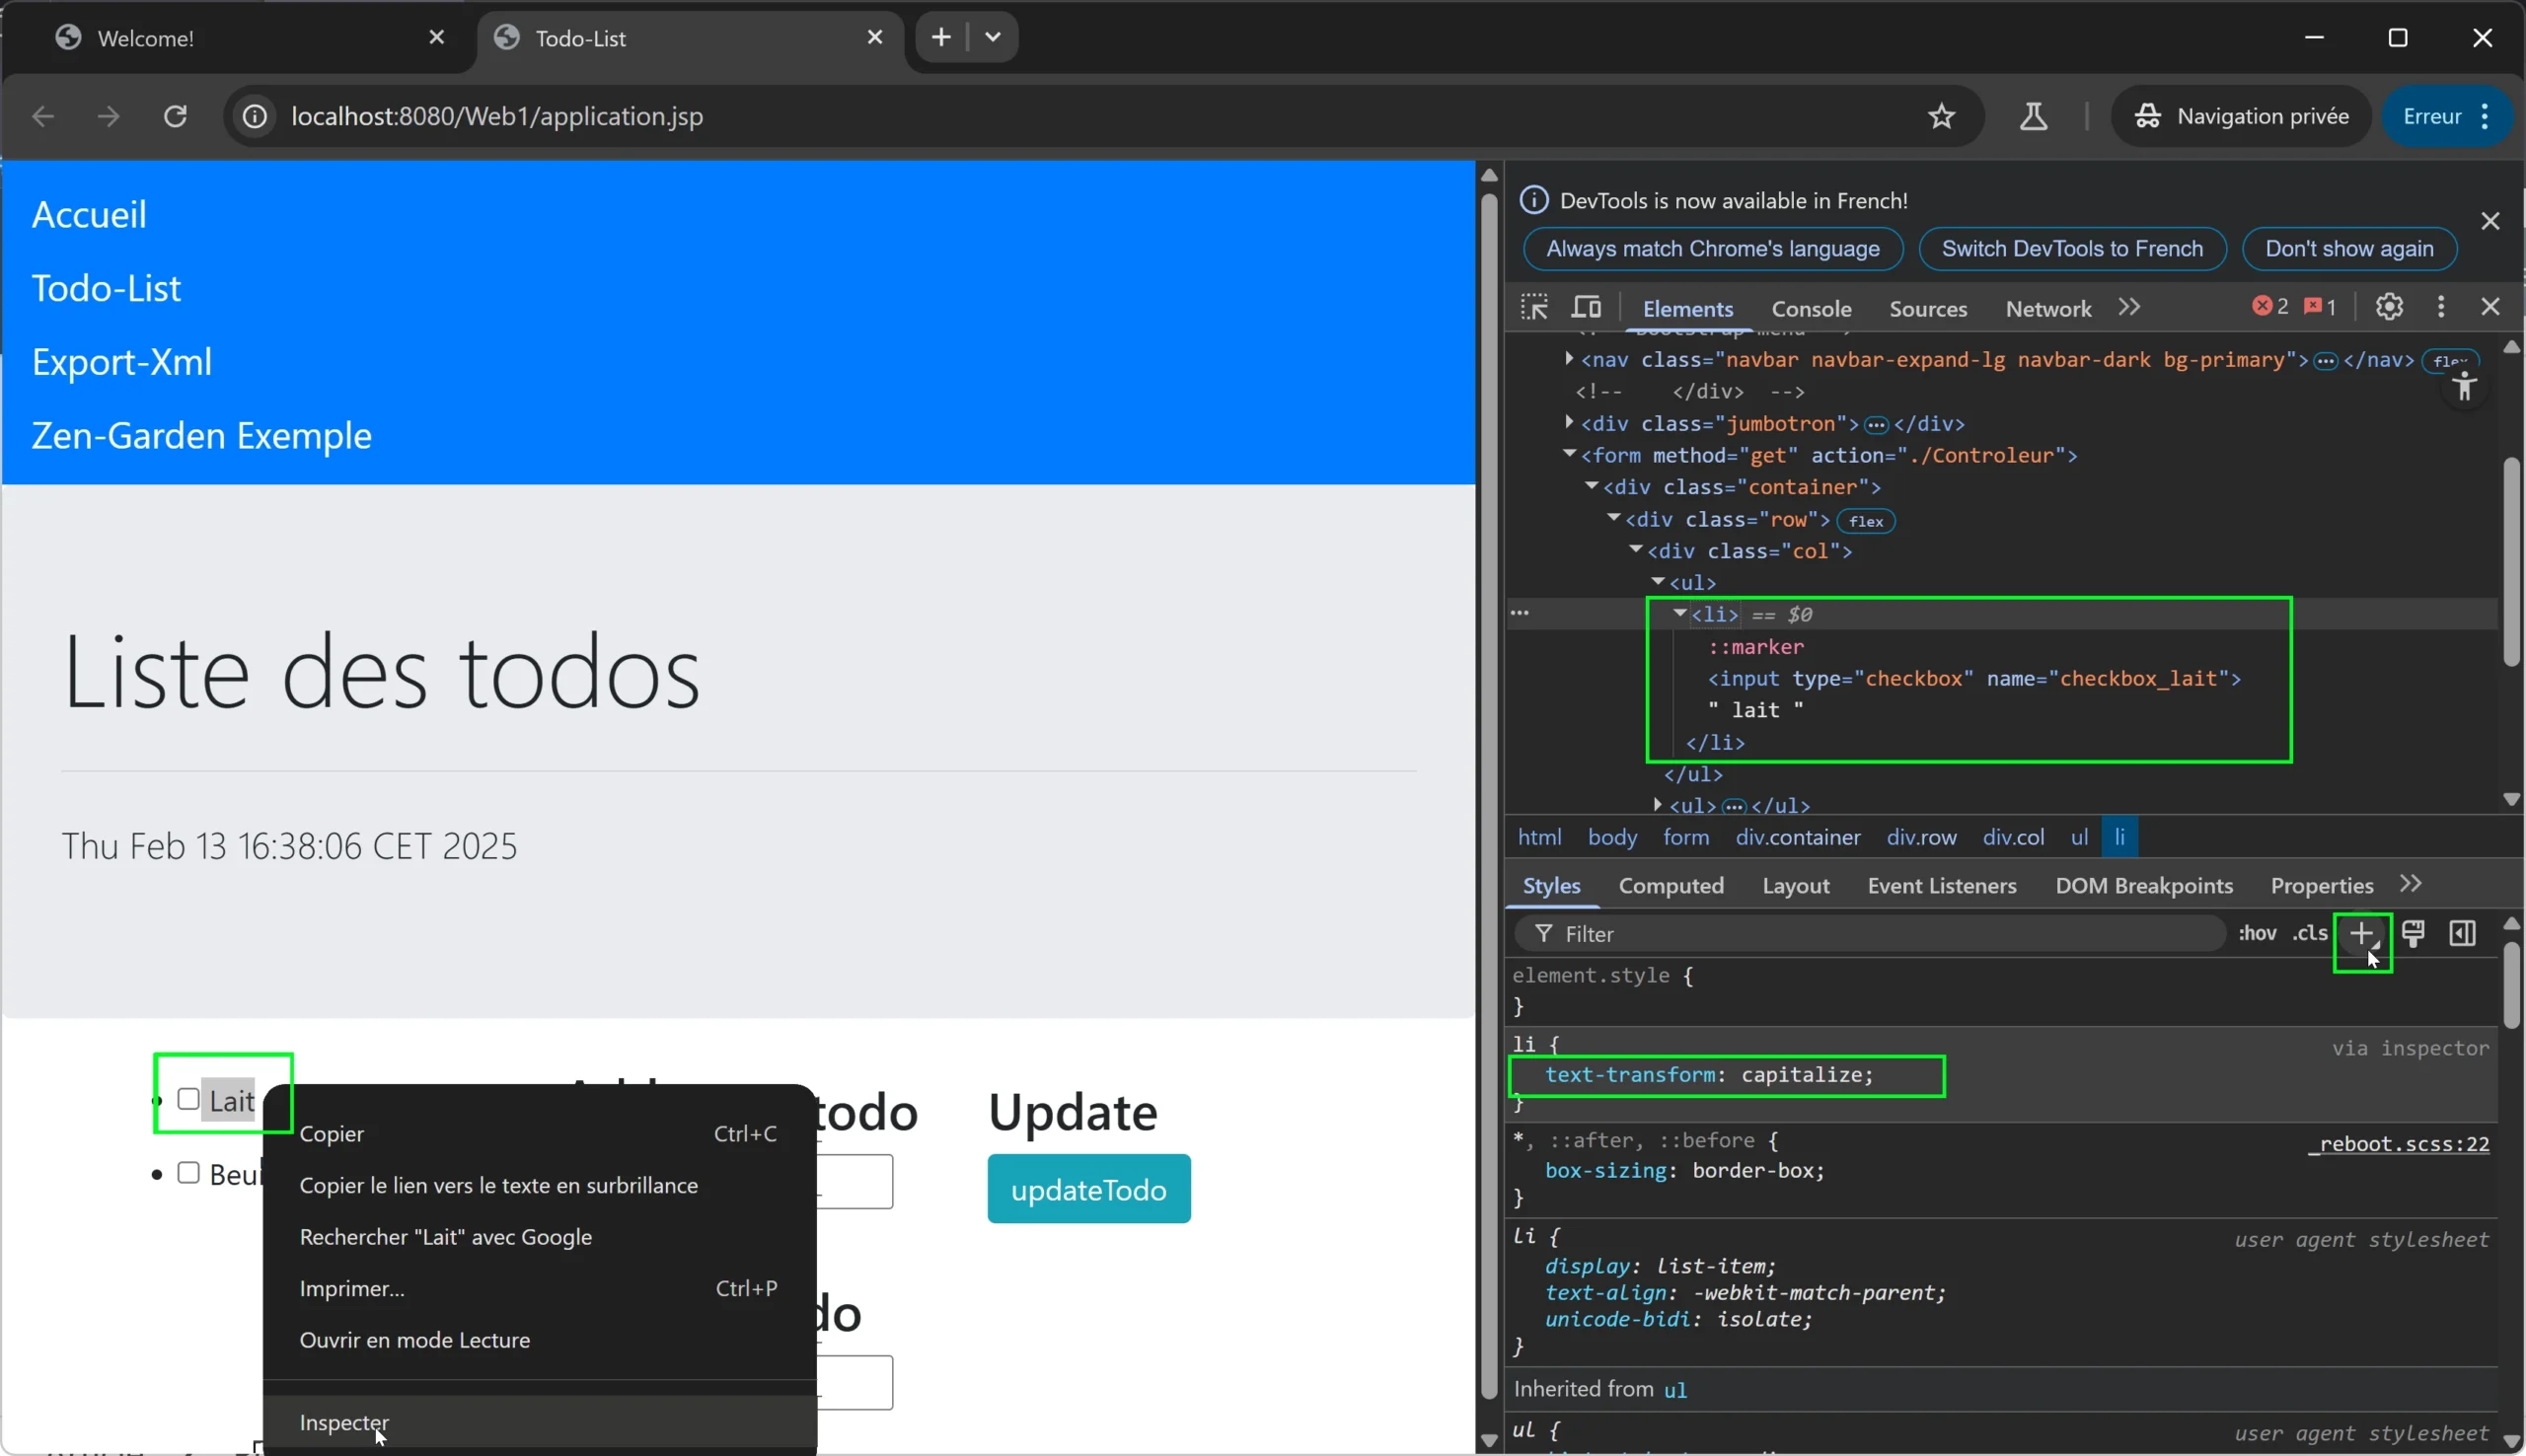
Then we want to use a CSS rule to put with an uppercase first letter for our list of todo element:
<li>
   <input type="checkbox" name="checkbox_lait" /> butter
</li>
The css rule will be :
li { text-transform: capitalize; }
You can test it by select the text near the checkbox, then « inspect » to display the HTML content on the Dev Web tools on the right. Then the small plus bouton could help to create a new rule. We can see the HTML text is not capitalize, but the display will be with a first capital letter :
2/ Area menu
Into the menu area, we will use a list of hyperlink to present a menu, consult the website alsacreation to create step by step a simple css menu. Please stop before using graphic menu with rollover and without javascript).
Our purpose here is to add a simple menu with some CSS features include the modification of a simple list tag element :
<ul><li><a href="#">Menu 1</a></li><li><a href="#">Menu 2</a></li></ul>
After the creation of the menu with the CSS style, place de code into a div menu as the image below shows.
Please change colors and design with CSS, it is definitely ugly to let your change as your witch.

To understand the organization between div and other HTML tag, please use the inspector include into Dev Web tools of your browser.
You can inspect the website www.mines-ales.fr, open dev web tools and follow steps as you see below or you can right-click on un HTML element and Menu > Inspector :
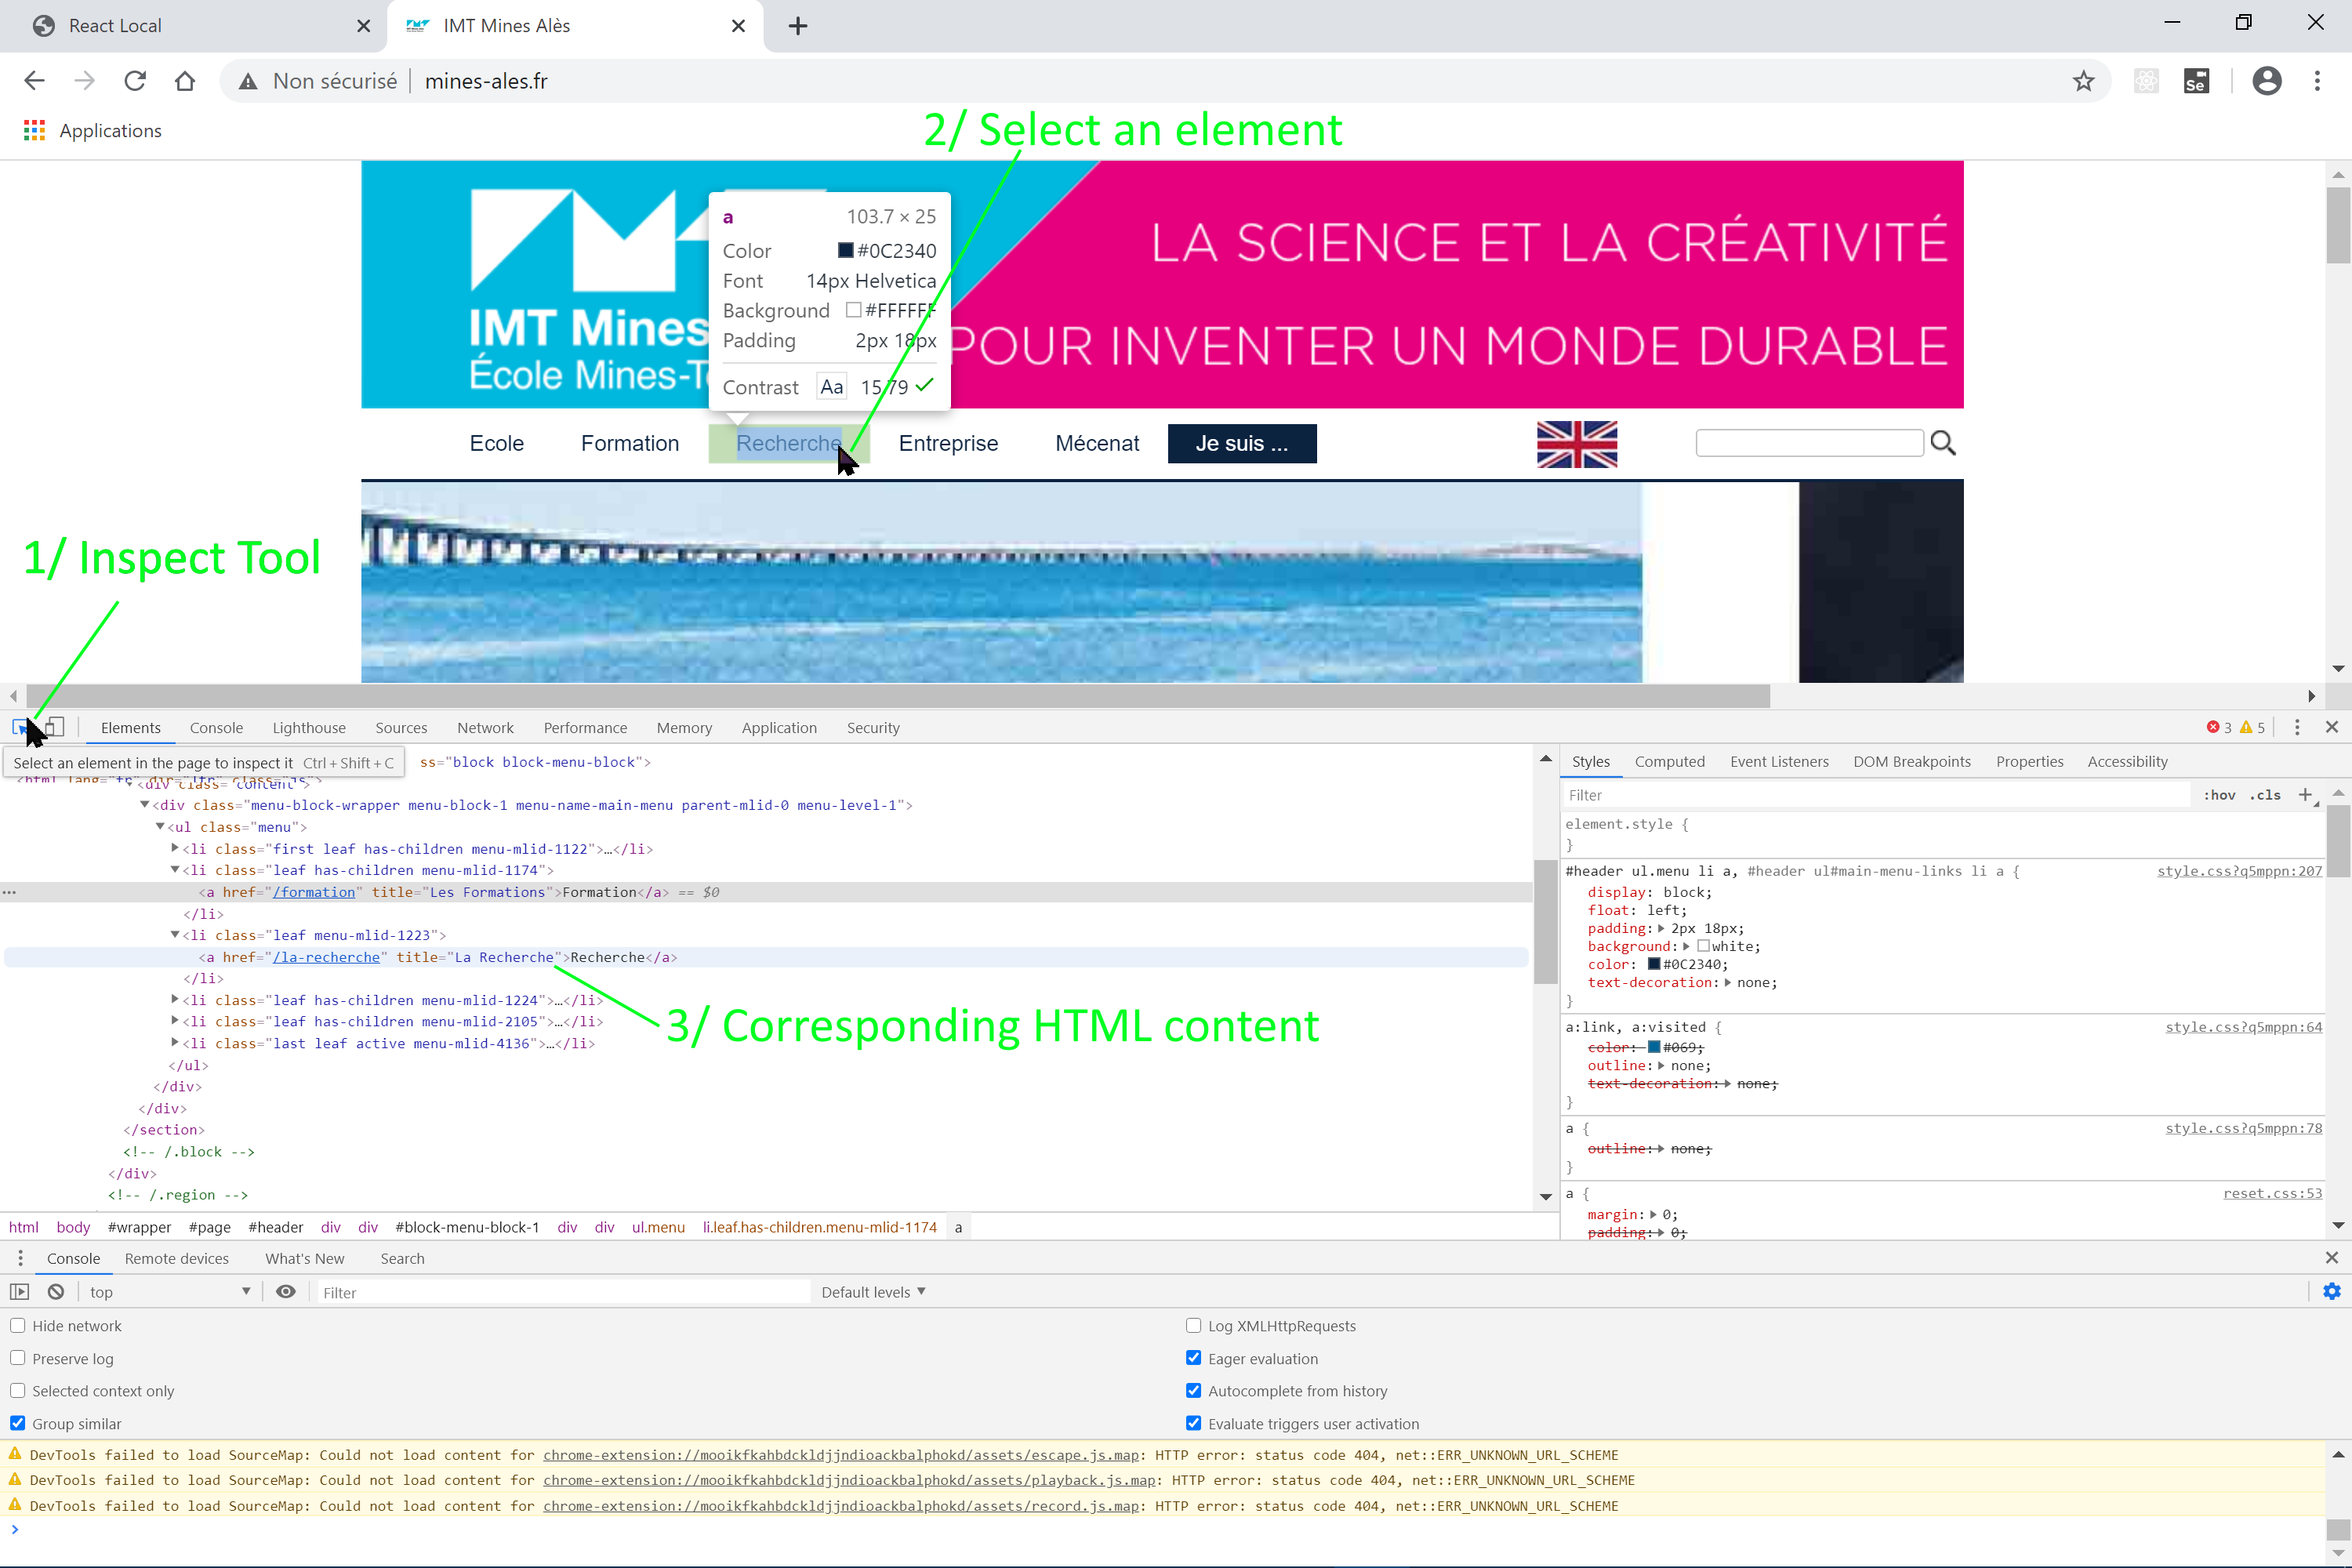
On the right part of Inspector, you can see CSS rules and test adding some new CSS. On a local website, you can use Chrome/Chromium with option to save directly your css modification with –user-data-dir switch on the browser command line (see TP 0).
You can create a basic menu with hyperlink to call your application controller as this way :
<ul>
  <li>
   <a href="./Controlaction=pageAddTodo">Add Todo</a>
  </li>
  <li>
      <a href="./Control?action=xml">Liste xml</a>
  </li>
  <li>
    <a href="./Control?action=json">Liste Json</a>
  </li>
</ul>
This form to create a menu is a very HTML way to avoid inject Javascript as we will do later.
3/ First step into Boostrap CSS framework
As start, we will use a so classical Boostrap template named Jumbotron. It is a classical top menu with a central area for title/small text paragraph/one button, then a line with 3 columns of combined title/paragraph/button and a footnote.
To understand the way Boostrap is degin, think about one line with a left area of 1/3 of the width (in green) and a second area same line but 2/3 of the width (in blue) :
<div class="row">
    <div class="col-md-3" style="background-color:green;padding:50px;">
             Left green area
     </div>

     <div class="col-md-9" style="background-color:blue;padding:50px;color:white">
             Right blue area
     </div>
</div>
The purpose of the next step is to rescue the Jumbotron and place our todo items list into the left column.

At first study with Inspector tool the HTML structure and decte the div which manage the left area. That should be a tag as below :
<div class="col-md-4">
We should think adding an ID attribute to this tag in the future to identify easily this important DIV.
To copy HTML just right-click on the HTML page and display HTML, select all, copy and paste. Or Open Tab Network with Dev Web Tools, select CSS and JS elements and choose to save each CSS/JS files :
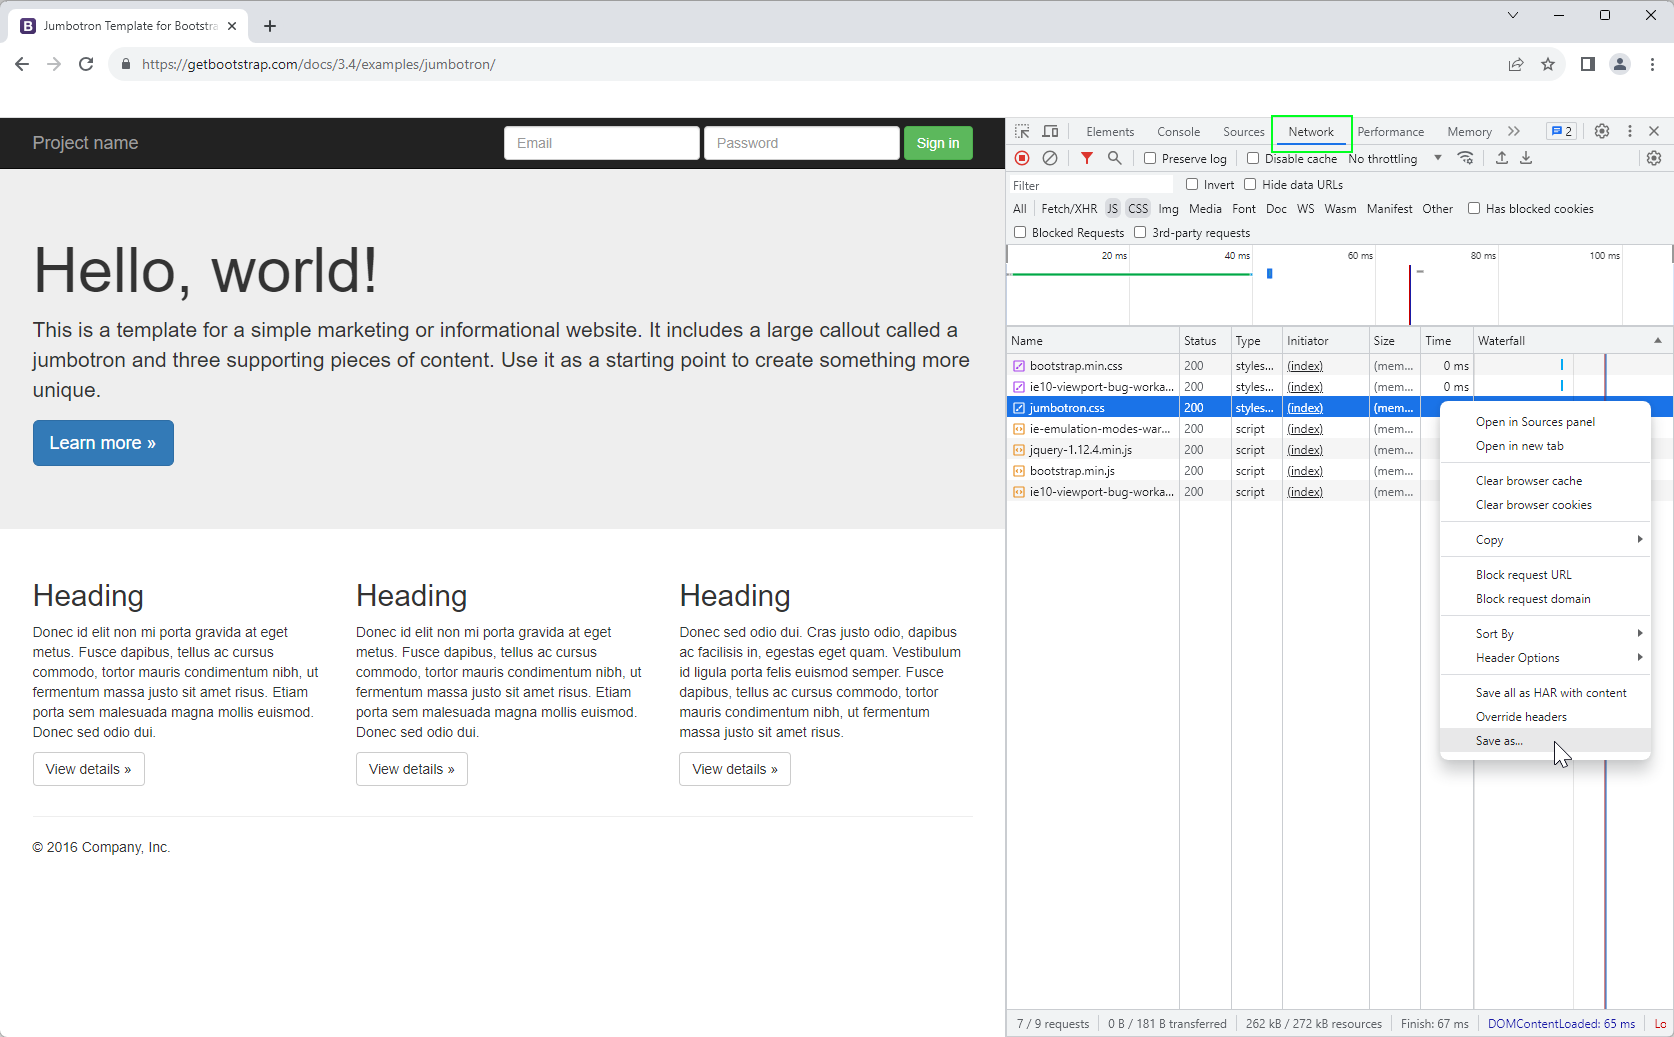
NOTE: Firefox do not save, so instead open into a separate tab and save each element. You don’t need e10-viewport-bug-workaround CSS or JS, we don’t need to support Internet Explorer 10 by now.
4/ Using logs
Using logs is one skill to manage 2 classical problems :
- I want several levels of display technical information, for example at least INFO and CRITICAL
- I want several sources and destination of technical information, for example: store information into files, send information to the console, send information to an external server.
A rookie in computer science usualy tend to write code with output to the console :
System.out.println("Error " + e);
This way to work with Tomcat will work, but all output will go into a file named catalina.out even if your web server as 10 different applications into one single file. A mess event if you use the second output System.err.println.
Thinking an application in production mode, you should want to store only critical information at the opposite in development mode, you should want verbose log.
Log4J is a Log framework tool managing several destination to logs (console and/or files and/or database and/or dedicated log server). We could start a program with a certain log level and even change it by program.
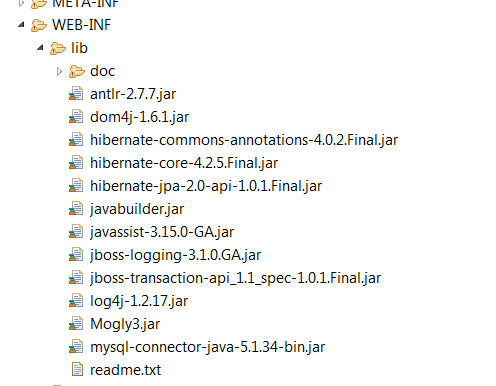
To install log4j, just download my library version log4j-1.2.17.jar (very simple to learn) and place it into sub folder lib (to create if not exist) into WEB-INF folder (inside webapp folder).
Add the new jar to the build path by right click on the jar Menu Build Path > Add to Build Path :

NOTE: we can add many jar libraries to deploy with our web project so each web application store its specifics jars independently on another dev web project as you see below :
NOTE: you should also use a tomcat specific lib folder to store libraries in common for all dev web projects on the Tomcat web server. The strategic is always to choose to fix a specific library for all the project to have a standard version, or in the opposite to let project autonomous. That a strategic in production decision.
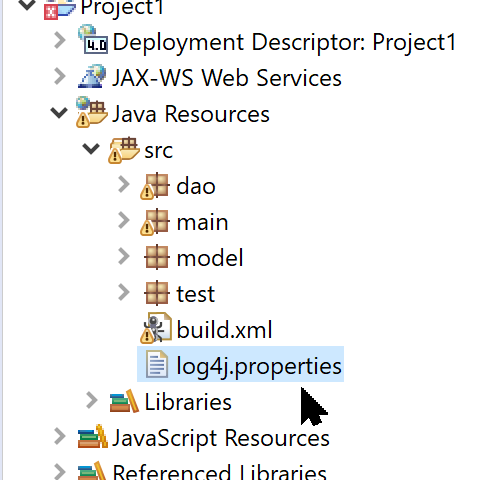
To configure log4j, we need to create a log4j.properties file into Java Resources > src folder (no need package, this is not a java file just a configuration file). Create a new file, righ click on the folder New > Other …> General > Untitled Text File.
Fill the file with information to output logs to the console and to a file store into a folder created by you into the Dev Web project (C:/DEV/workspace/DevWeb/logs/)
log4j.rootLogger=DEBUG,stdout,file

log4j.appender.stdout=org.apache.log4j.ConsoleAppender
log4j.appender.stdout.Target=System.out
log4j.appender.stdout.layout=org.apache.log4j.PatternLayout
log4j.appender.stdout.layout.ConversionPattern=%d{ABSOLUTE} %5p %c{1}:%L - %m%n


log4j.appender.file=org.apache.log4j.FileAppender
log4j.appender.file.File=C:/DEV/workspace/DevWeb/logs/out.log
log4j.appender.file.layout=org.apache.log4j.PatternLayout
log4j.appender.file.layout.ConversionPattern=%-7p %d [%t] %c %x - %m%n
NOTE: we will use a folder available to Eclipse after Refresh (F5 key) to make it simple to see new content, but it is more common to place files outside the computer on a separate drive.
NOTE2: if you find any troubles that Tomcat not found any appenders (WARNING: No appenders could be found for logger) into the console. You could copy the log4j.properties into the following folder : src/main/webapp/WEB-INF/classes/.
The first line is to set the log level to DEBUG and there are 2 loggers: stdout and file (named as you want but do not forget to change everywhere). We can later add more loggers to a database, a log server, emails, log rotation, etc.
Each line starting by log4j.appender.stdout sets settings for a logger which display information into the console as a System.out.println() did.
Each line starting by log4j.appender.file sets settings for a log file so the log file name and the pattern form of each line as :
Date: %d{ABSOLUTE}
Log level: %5p
Logger name: %c{1}
Log line number: %L
Message: %m
More pattern settings for log4j
Now to use a logger into a class, we will create a log instance as a property of you class :
private static final org.apache.log4j.Logger log = org.apache.log4j.Logger.getLogger("DevWebProject");
NOTE: I use the absolute name of the class Logger (org.apache.log4j) because Tomcat include others log framework (org.apache.commons.logging) for internal purpose and it could create conflict. Here is an example of strength/weakness of Java with several solutions for the feature of logging system, but the variety of framework create multiples situations not so easy to manage. At this opposite, the competition between framework create synergy to make better product.
Now, to log an information, we can call instance with the level of severity. There are usually 6 levels, from the most critical to the lowest :
- fatal
- error
- warm
- info
- debug
- trace
If the log4j properties file set the log level to info, logs messages at level fatal, error, warm and info will be sent.
Keep in mind to set the level accorded to the importance as explain it in this article: https://dzone.com/articles/logging-best-practices
As an example, if I ant to log a new created todo item, level will be very low debug level because in production I do not want this level of information.
// Action1 addTodo
if ("addTodo".equals(action)) {
  logger.debug( "addTodo " + texte );
}
Or this pattern way as exxample by Setu Patani in his article :
// Action1 addTodo
if ("addTodo".equals(action)) {
  logger.debug( String.format( "addTodo %s", texte ) );
}
Log4j new version accept pattern as this form :
// Action1 addTodo
if ("addTodo".equals(action)) {
  logger.debug( "addTodo {}", texte );
}
Now we can create messages with the log level according to the criticizes:
logger.trace("Very not important message");
logger.debug("May be useful in debug mode");
logger.info("Classical message level");
logger.warm("Just warning, but the code should not stop");
logger.error("Classical error level");
logger.fatal("Very important error");
So code several logs messages into your program and make it work to create many logs. Check console and the log file (Refresh folder with F5 key in Eclipse to update folder content)
The first line of log4j.properties file set the minimum error level :
log4j.rootLogger=DEBUG // display FATAL,ERROR,WARM, INFO et DEBUG
or
log4j.rootLogger=ERROR// display FATAL et ERROR
Into the program, I can change the level as I wish :
log.setLevel( org.apache.log4j.Level.INFO );
Now add a tird logger to display HTML report logs, with a new log :
log4j.appender.html=org.apache.log4j.DailyRollingFileAppender
log4j.appender.html.DatePattern='.'yyyy-MM-dd-HH-mm
log4j.appender.html.layout=org.apache.log4j.HTMLLayout
log4j.appender.HTML.layout.LocationInfo=true
log4j.appender.HTML.layout.Title=Application logs
log4j.appender.html.File=C:/Dev/workspace/logs/application.html
Do not forget to add it on the first line of log4j.properties and start again your web application to create new logs messages.
This logger will create an independent HTML file according to the date format. We can also create a Rolling file with a separate level call requete with a max log file and a max number of rolling log files with :
log4j.rootLogger=DEBUG,stdout, file
log4j.logger.requete=INFO, requete

log4j.appender.requete=org.apache.log4j.RollingFileAppender
log4j.appender.requete.File=c:/Dev/workspace/DevWeb/logs/requete.log log4j.appender.requete.layout=org.apache.log4j.PatternLayout
log4j.appender.requete.layout.ConversionPattern=%-7p %d [%t] %c %x - %m%n
log4j.appender.requete.MaxFileSize=10KB
log4j.appender.requete.MaxBackupIndex=5
This log could be use to log only SQL request but limit the number of file to preserve a certain amount of logs. This way several files requetes.log.X will be created until 10Kb for one file. After 5 files created, the first one will be deleted to store new logs.
5/ Install small plugin Eclipse Log Viewer
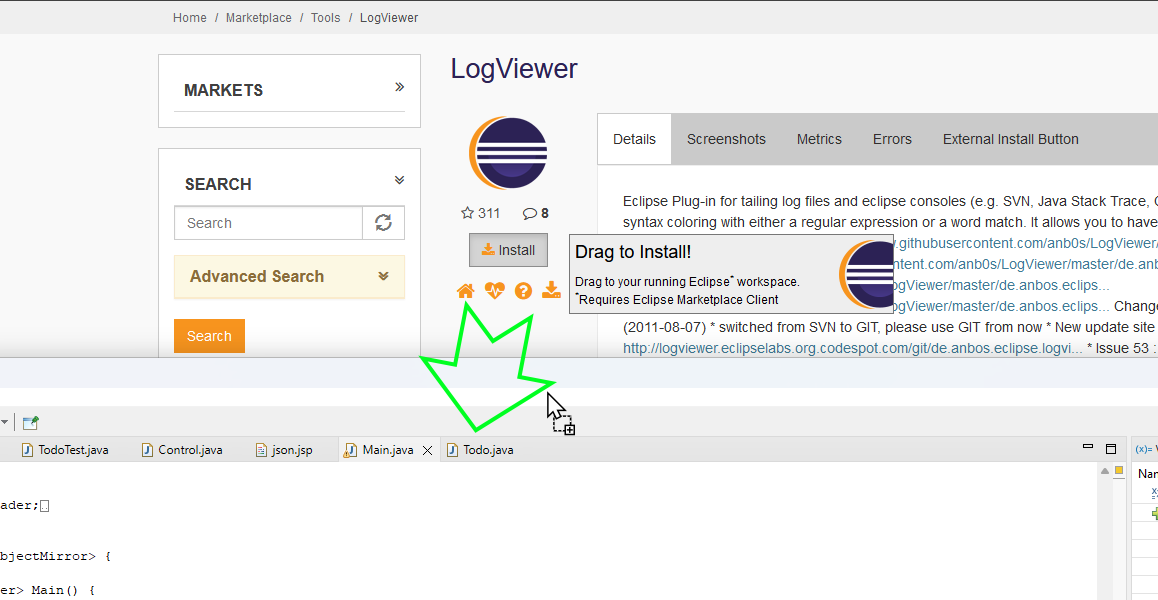
To display logs, you can use a small Eclipse plugin call Log Viewer. Just drag and drop the « Install » button into Eclipse to popup the windows to confirm installation (acceptation of license, acceptation of certificate, etc.)
Then you can display into your Eclipse J2EE perspective this new plugin via Menu Windows > Show View > Other… and search Log Viewer :

At the top right of Log Viewer panel, you can open log file, chose colorization, refresh display, etc.

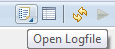
At first, open a log file newly created, press Open Logfile button :
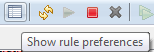
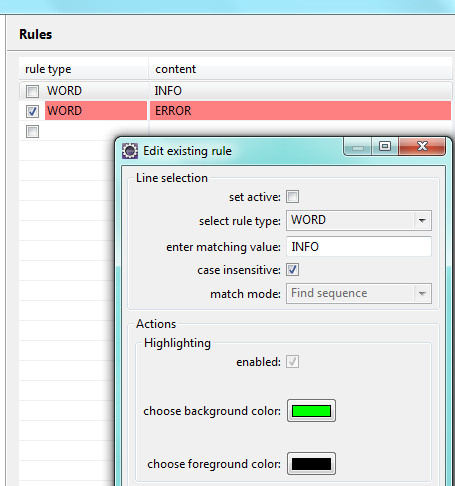
Then you can apply rules to display element with Show rules preferences:
So then we can set if word INFO, display background color is green, if word is ERROR, background color should be red :
You can display your log to follow the most critical part.
6/ Helper Class
Design pattern Helper is a concept of a « helping class ». As an example, suppose a class Book storing classical information about a book (the term used POJO: Plain-Old Java Object). Instances of book purpose is to store properties (title, page number, author, editor, ISBN, Series name, etc.).
Suppose we want to code several methods to check information as a control of ISBN value, we could imagine create a checkISBN() and checkAuthor() methods into a separate class named BookHelper to avoid including those methods into the Book class. Think the point Book purpose is to only store and provide properties only with getters and setters. So we need to store technical functions into a separate class.
We can imagine create a utility class to store methods which help to check ISBN and Author but fast this class will be full of methods from other class than Book. So let separate methods for class Book into a class BookHelper.
In our project, we can create a class ControlHelper to store method to help Control to log parameters pass to Control class :
private static final org.apache.log4j.Logger log = org.apache.log4j.Logger.getLogger( "BoostrapSample.main.ControlerHelper" );

public static void logAllParameters(HttpServletRequest request){

 Map<String, String[]> parameters = request.getParameterMap();
 for(String parameter : parameters.keySet()) {
    String[] values = parameters.get(parameter);
    String value = Arrays.stream( values ).collect(Collectors.joining(","));

    log.info( "Parametre " + parameter + " " + value );
 }

}
Into this method, we use a « new » feature from Java called stream. Streams are a modern way to speed up classical list data processing. Serialization of data processing with stream could be execute on list structures as classes/interfaces Set, List, ArrayList, Map, Array, Collection, etc.
To convert an « old » String[] values into a stream to speed up data processing and create more visible chain of treatment with inline method :
Arrays.stream( values )
NOTE: using inline method is also used in Javascript as we see later
Calling an inline method or anonymous is a programming technic to create an instance and call a method in one line. Suppose we want to code a new call to action method on a button into a graphical interface :
Button b=new Button("Click Here");

b.addActionListener(
   new ActionListener(){
        public void actionPerformed(ActionEvent e){
            System.out.println("Hello World!");
    }
});
In this case the class ActionListerner only purpose is to execute one unique method actionPerformed. The inline version with Java lamba solution should be more visible :
b.addActionListener( e -> System.out.println("Hello World!"));
The simplification is obvious and time to time called syntaxes sugar to symbolize as easy you could read this line of code.
Into our application, we will use a stream onto our lesTodos list :
lesTodos.stream()
Now we want to use a filter method to return only todos items with actif true value. The symbol -> use at left what is the parameter name on each stream element, then it will apply the method on each right part :
todo -> todo.isActif()
You can compare with the anonymous version :
Class anonymous{
   public boolean method_call_by-default(Todo todo){
       return todo.isActif();
   }
}
So combine previous part, the stream will be :
lesTodos.stream().filter( todo -> todo.isActif())
This feature, mainly used with Data mining and Big Data, is to combine and chain operation to use JVM parallelization capabilities.
Combine todo to rescue only texte of todo actif will be :
lesTodos.stream().filter( todo -> todo.isActif()).map( todo -> todo.getTexte() )
We can then combien and merge data with a separator symbol en transform the final result into a String with :
String reponse = lesTodos.stream().filter( todo -> todo.isActif()).map( todo -> todo.getTexte() ).collect(Collectors.joining(","));
Online, you will find many samples using streams to work, Oracle website shows a sum of integers as a good example.
7/ Conditional debug breakpoint
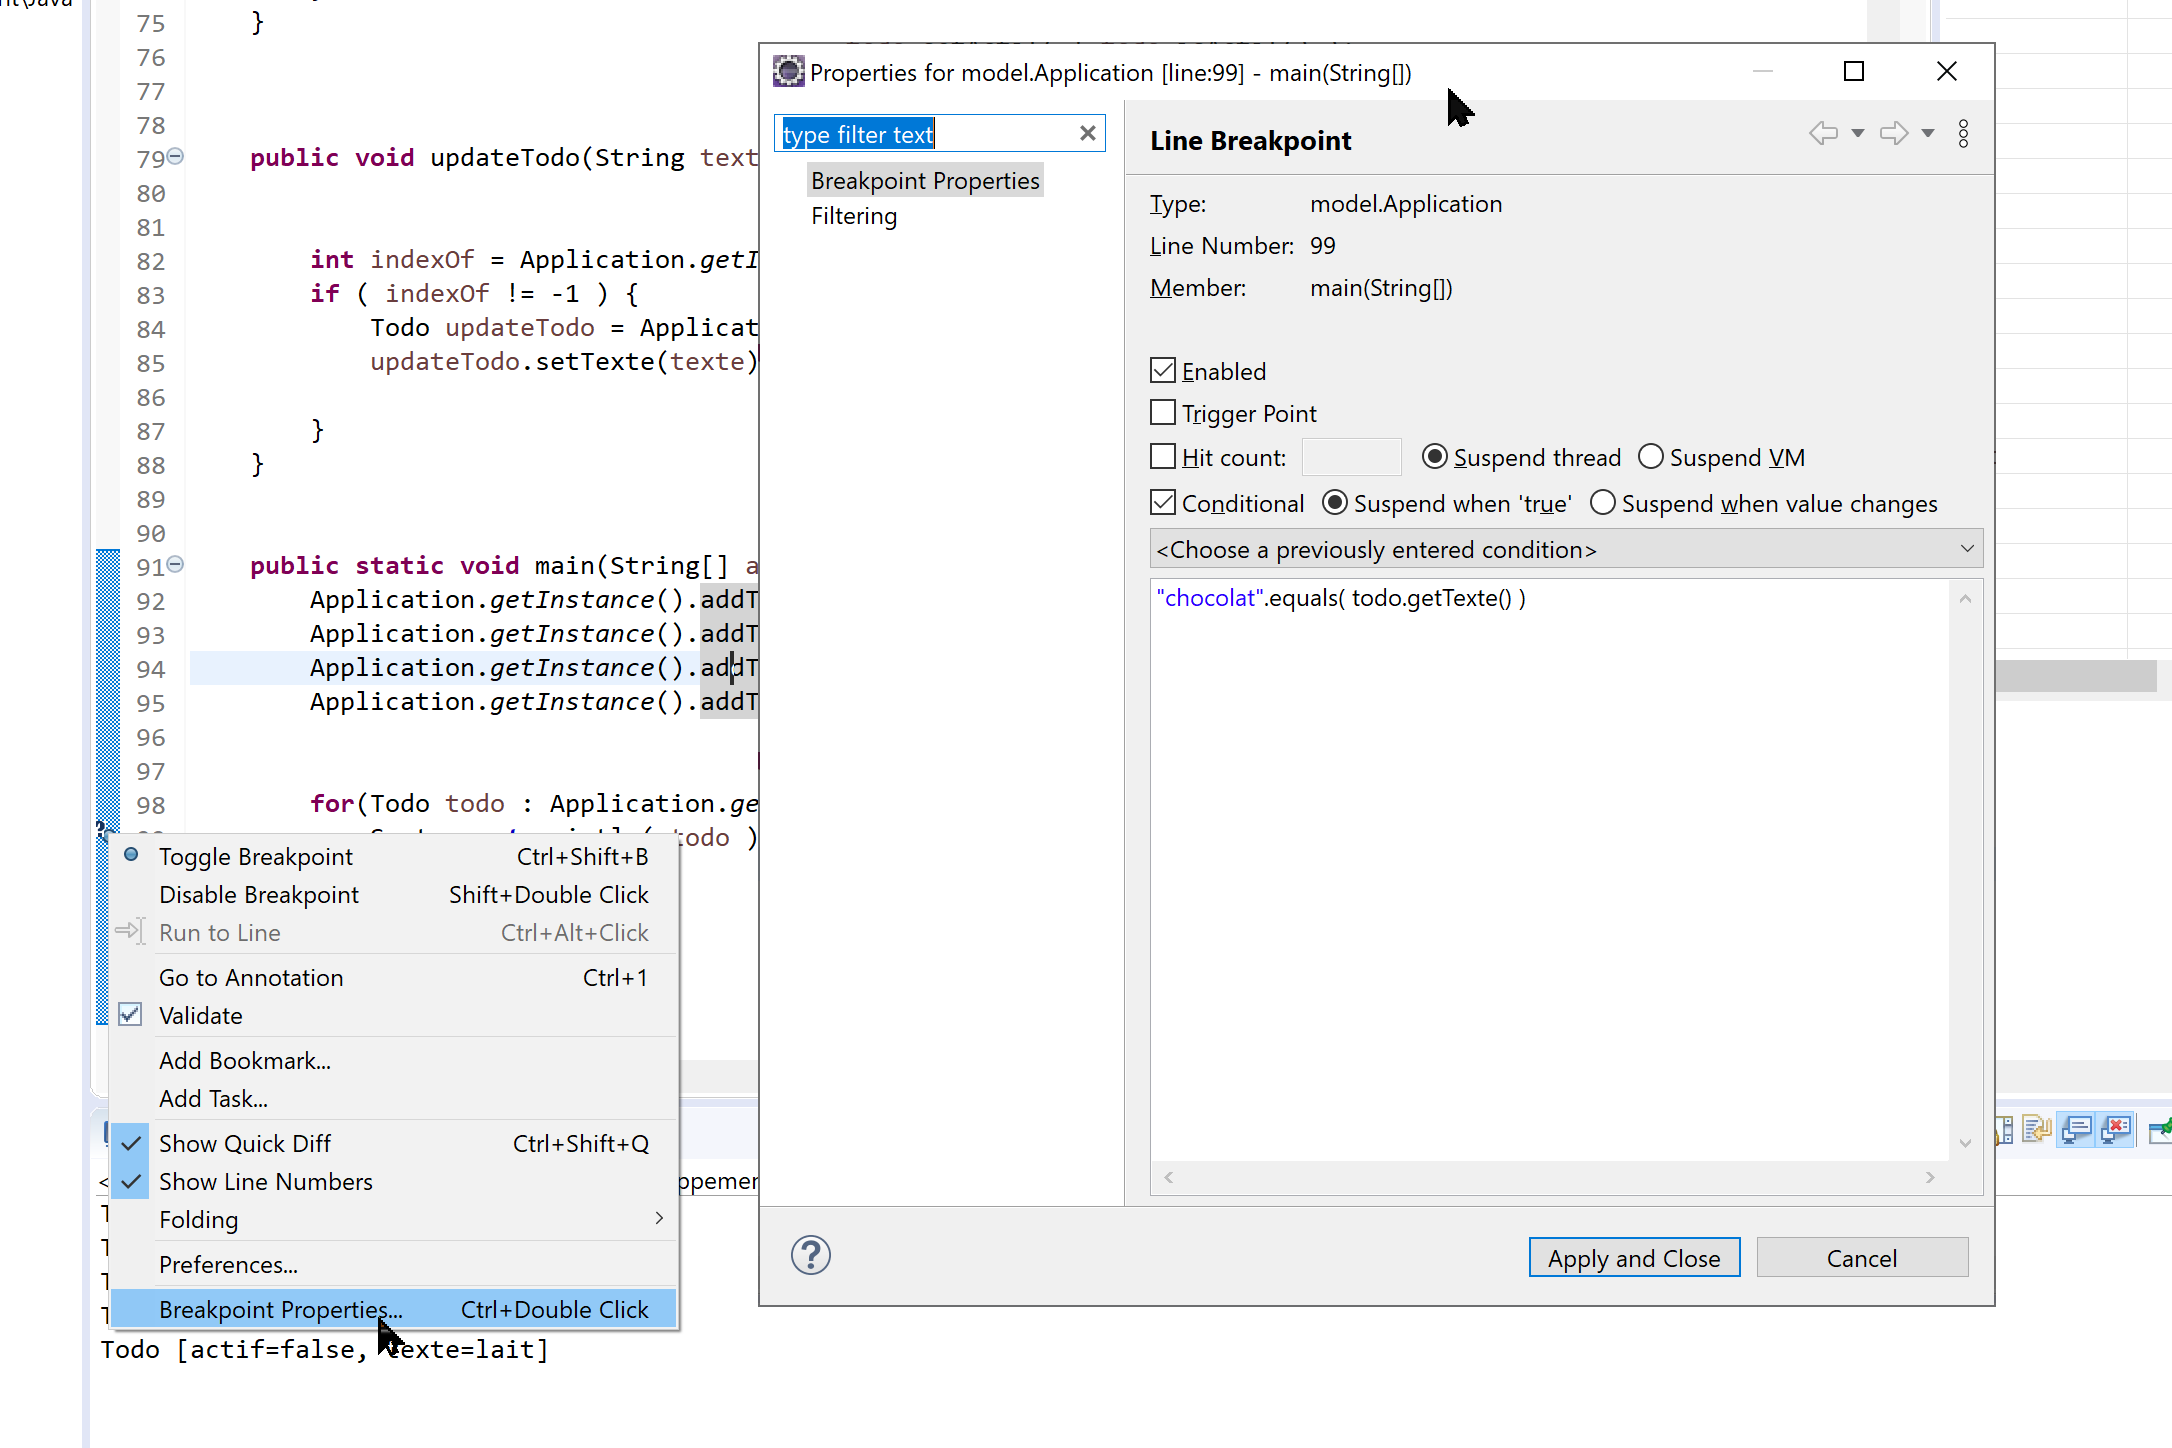
A common feature with modern IDE is to create a conditional debug breakpoint. Right click in Eclipse at the left of line number into the source code interface et select into the Menu « Breakpoint Properties…« , then you can tick « Conditional« , « Suspend when true » :
Using conditional breakpoint while debug is a way to speed up development. Time to time I debug from the beginning line by line to understand a process, later it will be more valuable to only debug into a certain case. Try it…
8/ Database part
To use a database we will add a JDBC connector linking our Java code to this database. You can use a Mysql JDBC connector if you want to use an already install Mysql server. I use Mysql regulary but for a training course, to manage security, you should consider using a simple Sqlite database.
Using Sqlite with Java is just adding a new JAR sqlite-jdbc-3.8.11.2.jar (or if broken here) into lib directory and create into dao package a new DaoManager class.
The folowing code is an partial example of a singleton DaoManager class, you should improve it with your previous code write until now.
public class DaoManager {
  private DaoManager() {
    try {
      Class.forName("org.sqlite.JDBC");
      connection = DriverManager.getConnection("jdbc:sqlite:c:/DEV/Workspace/todo.db");
     } catch (Exception e) {
      log.severe( String.format( "Sqlite error %s" , e.getMessage() ) );
      }
     log.info("Opened database successfully");

   createDatabase();
  }


  private void createDatabase() {
    try {
      Statement stmt = connection.createStatement();
      String sql = "CREATE TABLE IF NOT EXISTS TODO ( ID INTEGER PRIMARY KEY AUTOINCREMENT, TEXTE TEXT NOT NULL, ACTIF BOOLEAN NOT NULL)";

      stmt.executeUpdate(sql);
      stmt.close();
     } catch (Exception e) {
       log.severe( e.getClass().getName() + ": " + e.getMessage() );
     }
    addTodo( new Todo("ananas" , false ) );
    addTodo( new Todo("chocolat" , false ) );
  }

public void addTodo(Todo todo){

  try {
    PreparedStatement preparedStatment = connection.prepareStatement("insert into TODO(TEXTE,ACTIF) values( ? , ? )" );

    preparedStatment.setString(1, todo.getTexte() );
    preparedStatment.setBoolean(2, todo.isActif() );

    preparedStatment.execute();
    preparedStatment.close();

  } catch (Exception e) {
     log.severe( e.getClass().getName() + ": " + e.getMessage() );
   }
}

public List<Todo> getAllTodo(){
   List<Todo> returnListTodo = new ArrayList<Todo>();
   try {
      Statement statement = connection.createStatement();

      if ( statement.execute( "Select TEXTE,ACTIF FROM TODO " ) ){
        ResultSet resultSet = statement.getResultSet();
        while ( resultSet.next() ) {
          String texte = resultSet.getString("TEXTE");
          boolean actif = resultSet.getBoolean("ACTIF");

          returnListTodo.add( new Todo( texte , actif ));
        }
       }
       statement.close();

    } catch (Exception e) {
        log.severe( e.getClass().getName() + ": " + e.getMessage() );
    }
     return returnListTodo
  }

}
There are 2 strategies to call DaoManager singleton, one from the Control class and one from the Application. In my mind, I think more logical to call DaoManager from Control class with « have the hand » over Application class and DaoManager to do the job.
After calling DaoManager, you should create the database sqlite file c:/DEV/Workspace/todo.db , to check content and structure, I think https://sqlitebrowser.org/dl/ tool it is perfect to open and manage database as phpMyAdmin does for Mysql.
The file c:/DEV/Workspace/todo.db storing the database is locked if you open it with Sqlitebrowser so close the access before restart your web application.
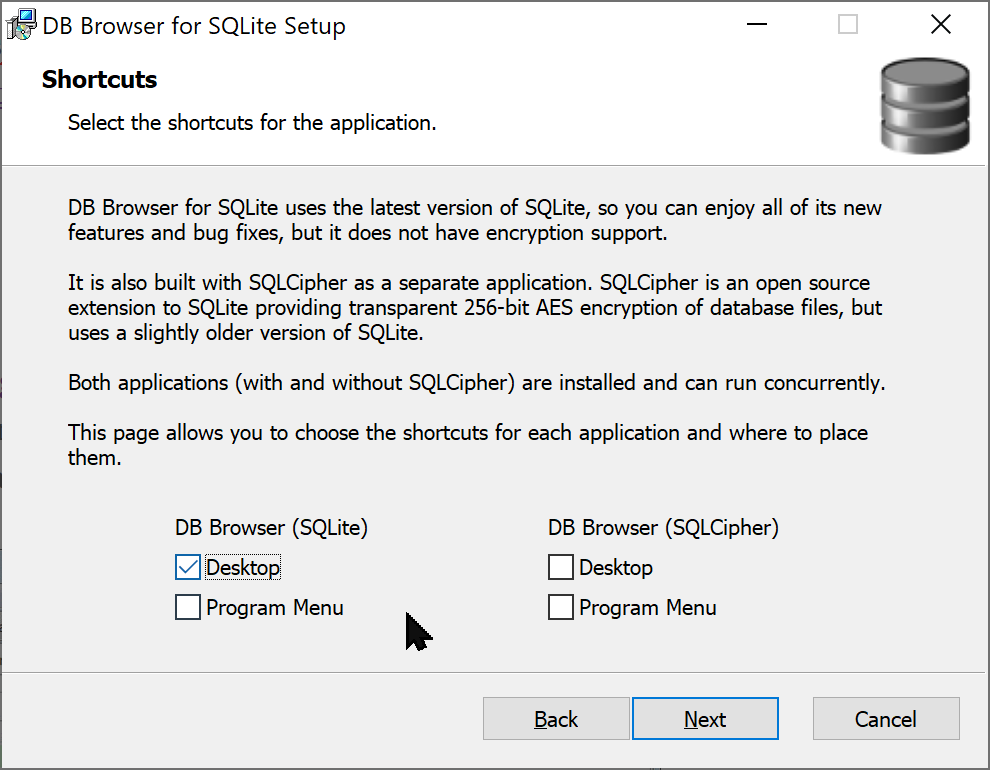
Install Sqlite with DB Browser Desktop check :
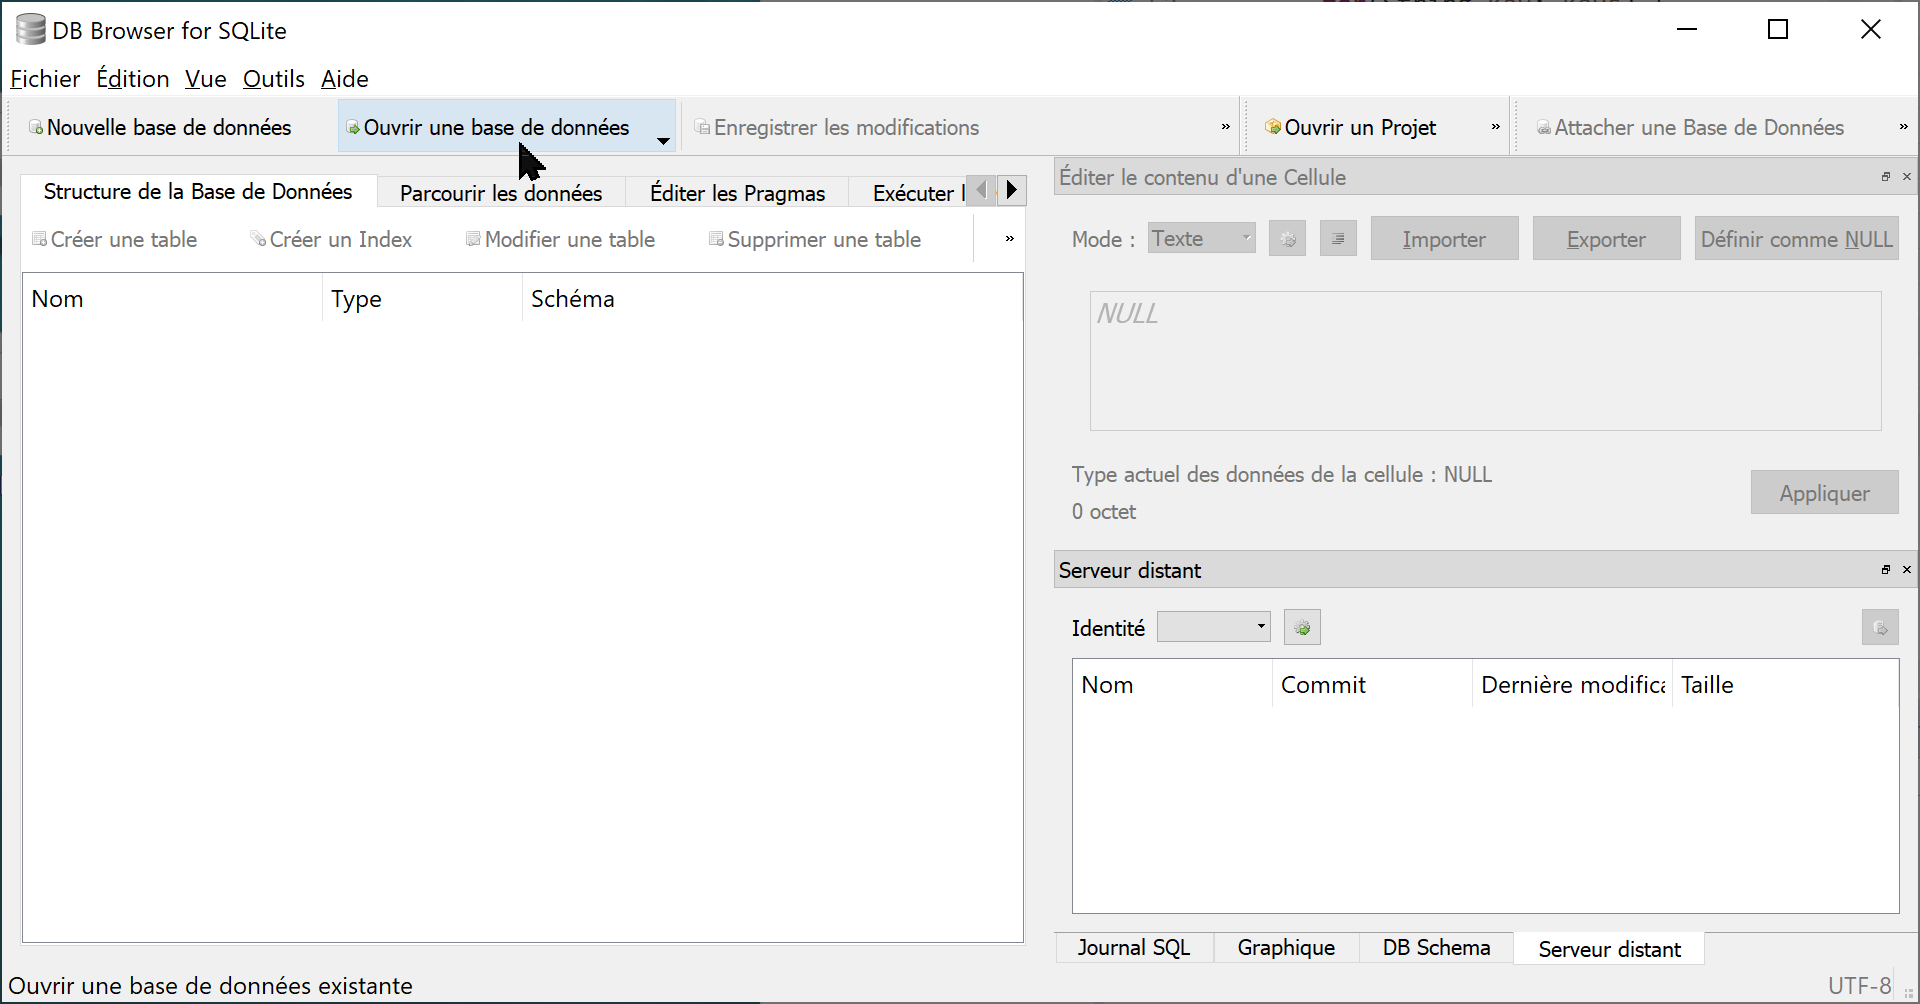
Then start DBBrowser and open c:/DEV/Workspace/todo.db :
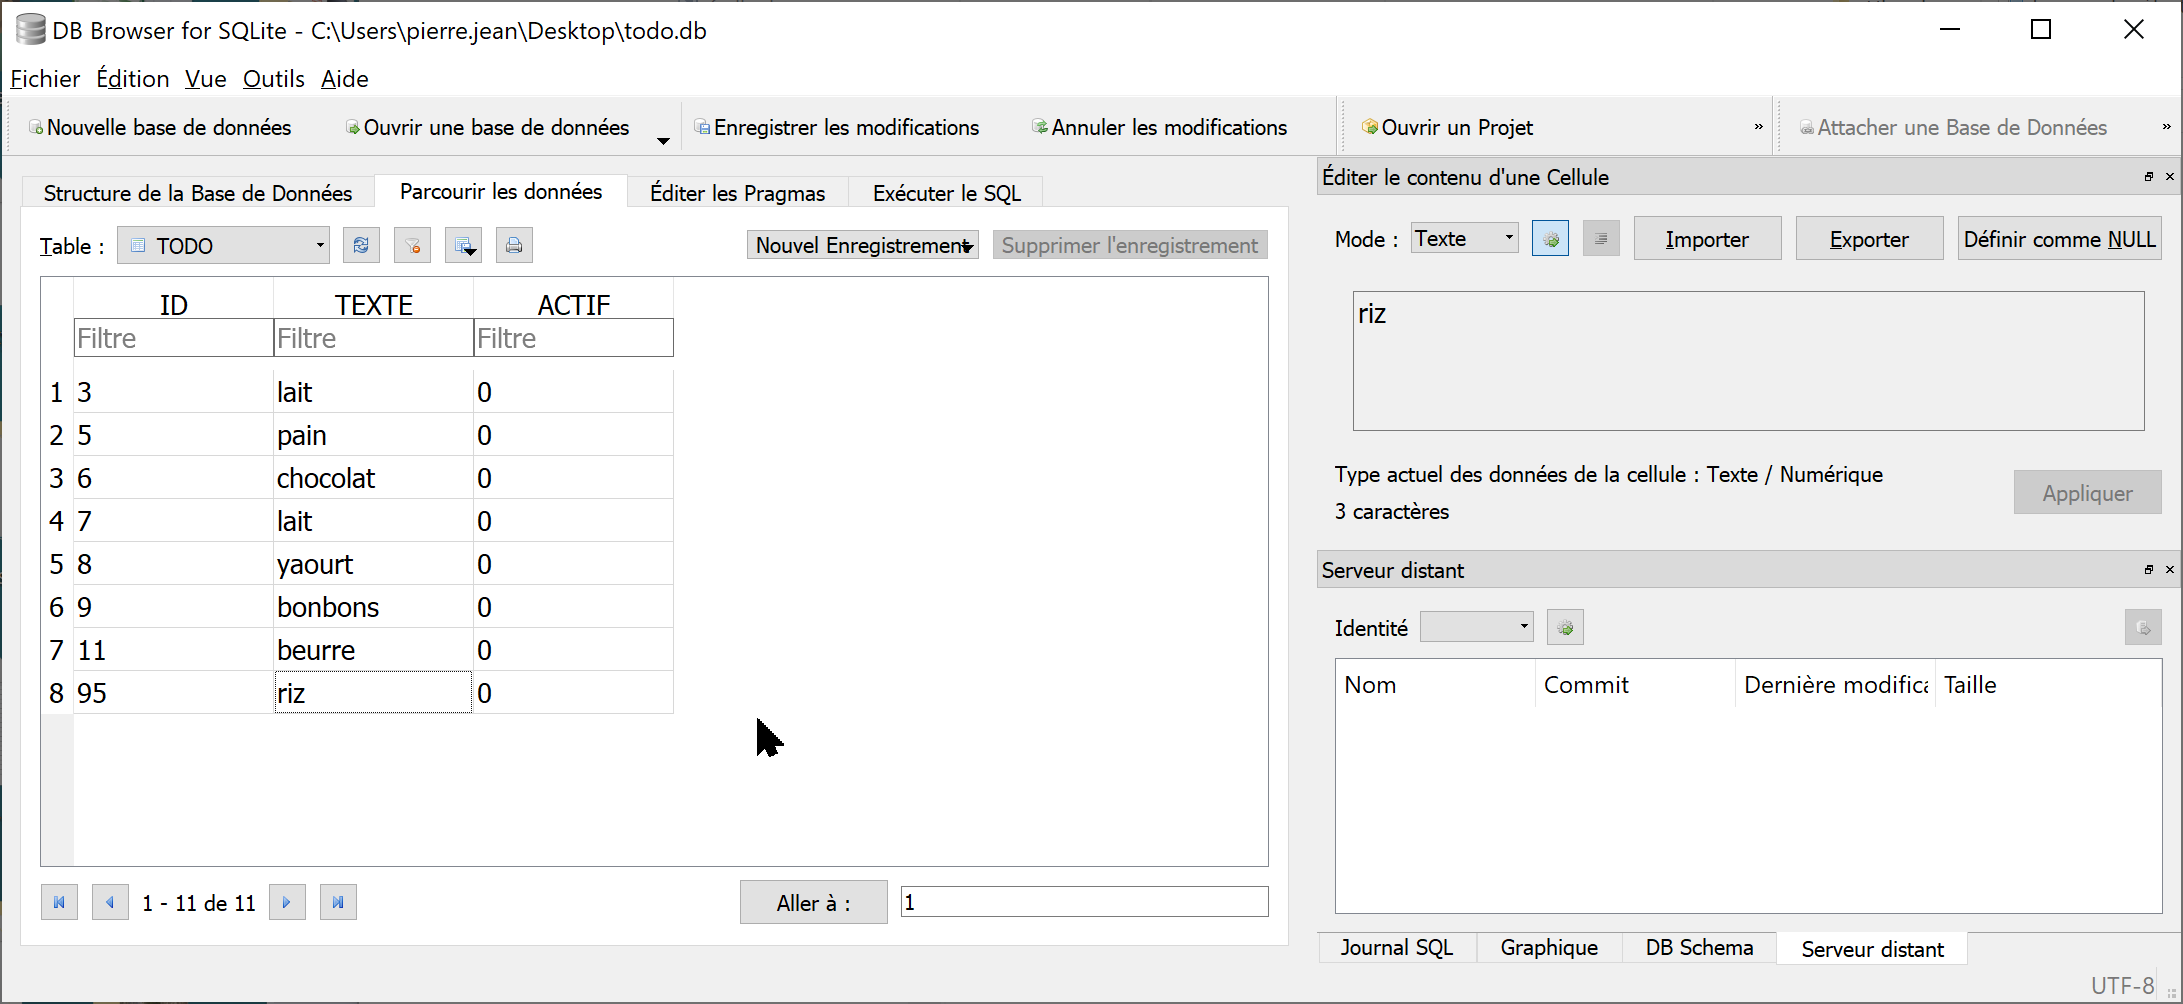
You can browse your data as you wish :
You can use this tool to check todo items are stored into the database. We will load the list of todo items each time Control class is called. There are solutions to avoid calling on each HTTP request, but at start we are close as standard 3-tiers architectures.
Now there are an important modification of your application. Add a new property call id (of type int) to your Todo class. This id manage a unique identification number for your todo item.
DaoManager should create a table Todo with an auto increment column ID. The database will generate this unique ID et your code should rescue it with a method call getGeneratedKeys() after an SQL command INSERT INTO… :
ResultSet rs = preparedStatment.getGeneratedKeys();
if (rs.next()) {
   autoGeneratedIdFromDatabase = rs.getInt(1);
   todo.setId( autoGeneratedIdFromDatabase );
} else {
 logger.error( String.format("Error exception %s ", ex.getMessage() ) );
}
Now you can use this new ID value to manage your todo for update/delete everywhere into your application. An important refactoring work to check you can manage this evolution of the project.
9/ Optionnal: logs message into the database
Change settings bellow to link log4j to sqllite database file and do not forget to create the new table.
log4j.rootLogger=DEBUG, DB

# Configuration de l'appendice JDBC
log4j.appender.DB=org.apache.log4j.jdbc.JDBCAppender
log4j.appender.DB.URL=jdbc:sqlite:votre_base_de_donnees.db
log4j.appender.DB.driver=org.sqlite.JDBC
log4j.appender.DB.user=
log4j.appender.DB.password=

# Requête SQL pour insérer les logs
log4j.appender.DB.sql=INSERT INTO logs (timestamp, level, logger, message) VALUES ('%d{yyyy-MM-dd HH:mm:ss}', '%p', '%c', '%m')

# Mise en correspondance des colonnes de la table de logs
log4j.appender.DB.layout=org.apache.log4j.PatternLayout
log4j.appender.DB.layout.ConversionPattern=%d{yyyy-MM-dd HH:mm:ss} %p %c: %m%n
It will be more common to have a different server to store log usualy a NoSql database.
SQL :
CREATE TABLE logs (
    id INT IDENTITY(1,1) PRIMARY KEY,
    timestamp VARCHAR(255),
    level VARCHAR(50),
    logger VARCHAR(255),
    message TEXT
);
